

Imagine walking into a store where everything is neatly organized - you find what you need in seconds. Now picture the opposite: cluttered aisles, no signs, and endless searching. Which store would you rather shop in?
Your Shopify menu and store navigation work the same way! A well-structured menu makes shopping effortless, guiding customers straight to what they need and boosting your sales. But if your navigation is confusing, shoppers might leave before even seeing your best products.
In this article, we’ll cover:
- The importance of clear store navigation for user experience and sales
- How to set up and customize your Shopify menu
- Recommendations of some top-rated Shopify menu apps
By the end, you’ll have all the tools to build a Shopify store that’s easy to explore and impossible to resist!
1. Shopify menu: A guide to enhancing store navigation
A well-structured menu is the secret to a smooth and enjoyable shopping experience. When customers visit your Shopify store, they should be able to navigate effortlessly, finding exactly what they need without confusion. That’s where Shopify menus come in.
1.1. Definition of Shopify menu and menu items
A menu in Shopify is a structured collection of links that customers use to navigate your store. It serves as a roadmap, allowing users to access different sections such as product collections, blog pages, or customer service information.

Each menu consists of multiple menu items. A menu item is an individual link within the menu that directs customers to a specific destination - this could be a product page, a collection, an external URL, or even a contact form.
For example, in a fashion store, a Shopify menu might include menu items such as:
- Homepage: A quick way for customers to return to the main page.
- Catalog/Shop: Direct access to all products or categorized collections.
- About Us: A place to share your brand’s story.
- Contact: Customer support and inquiries.
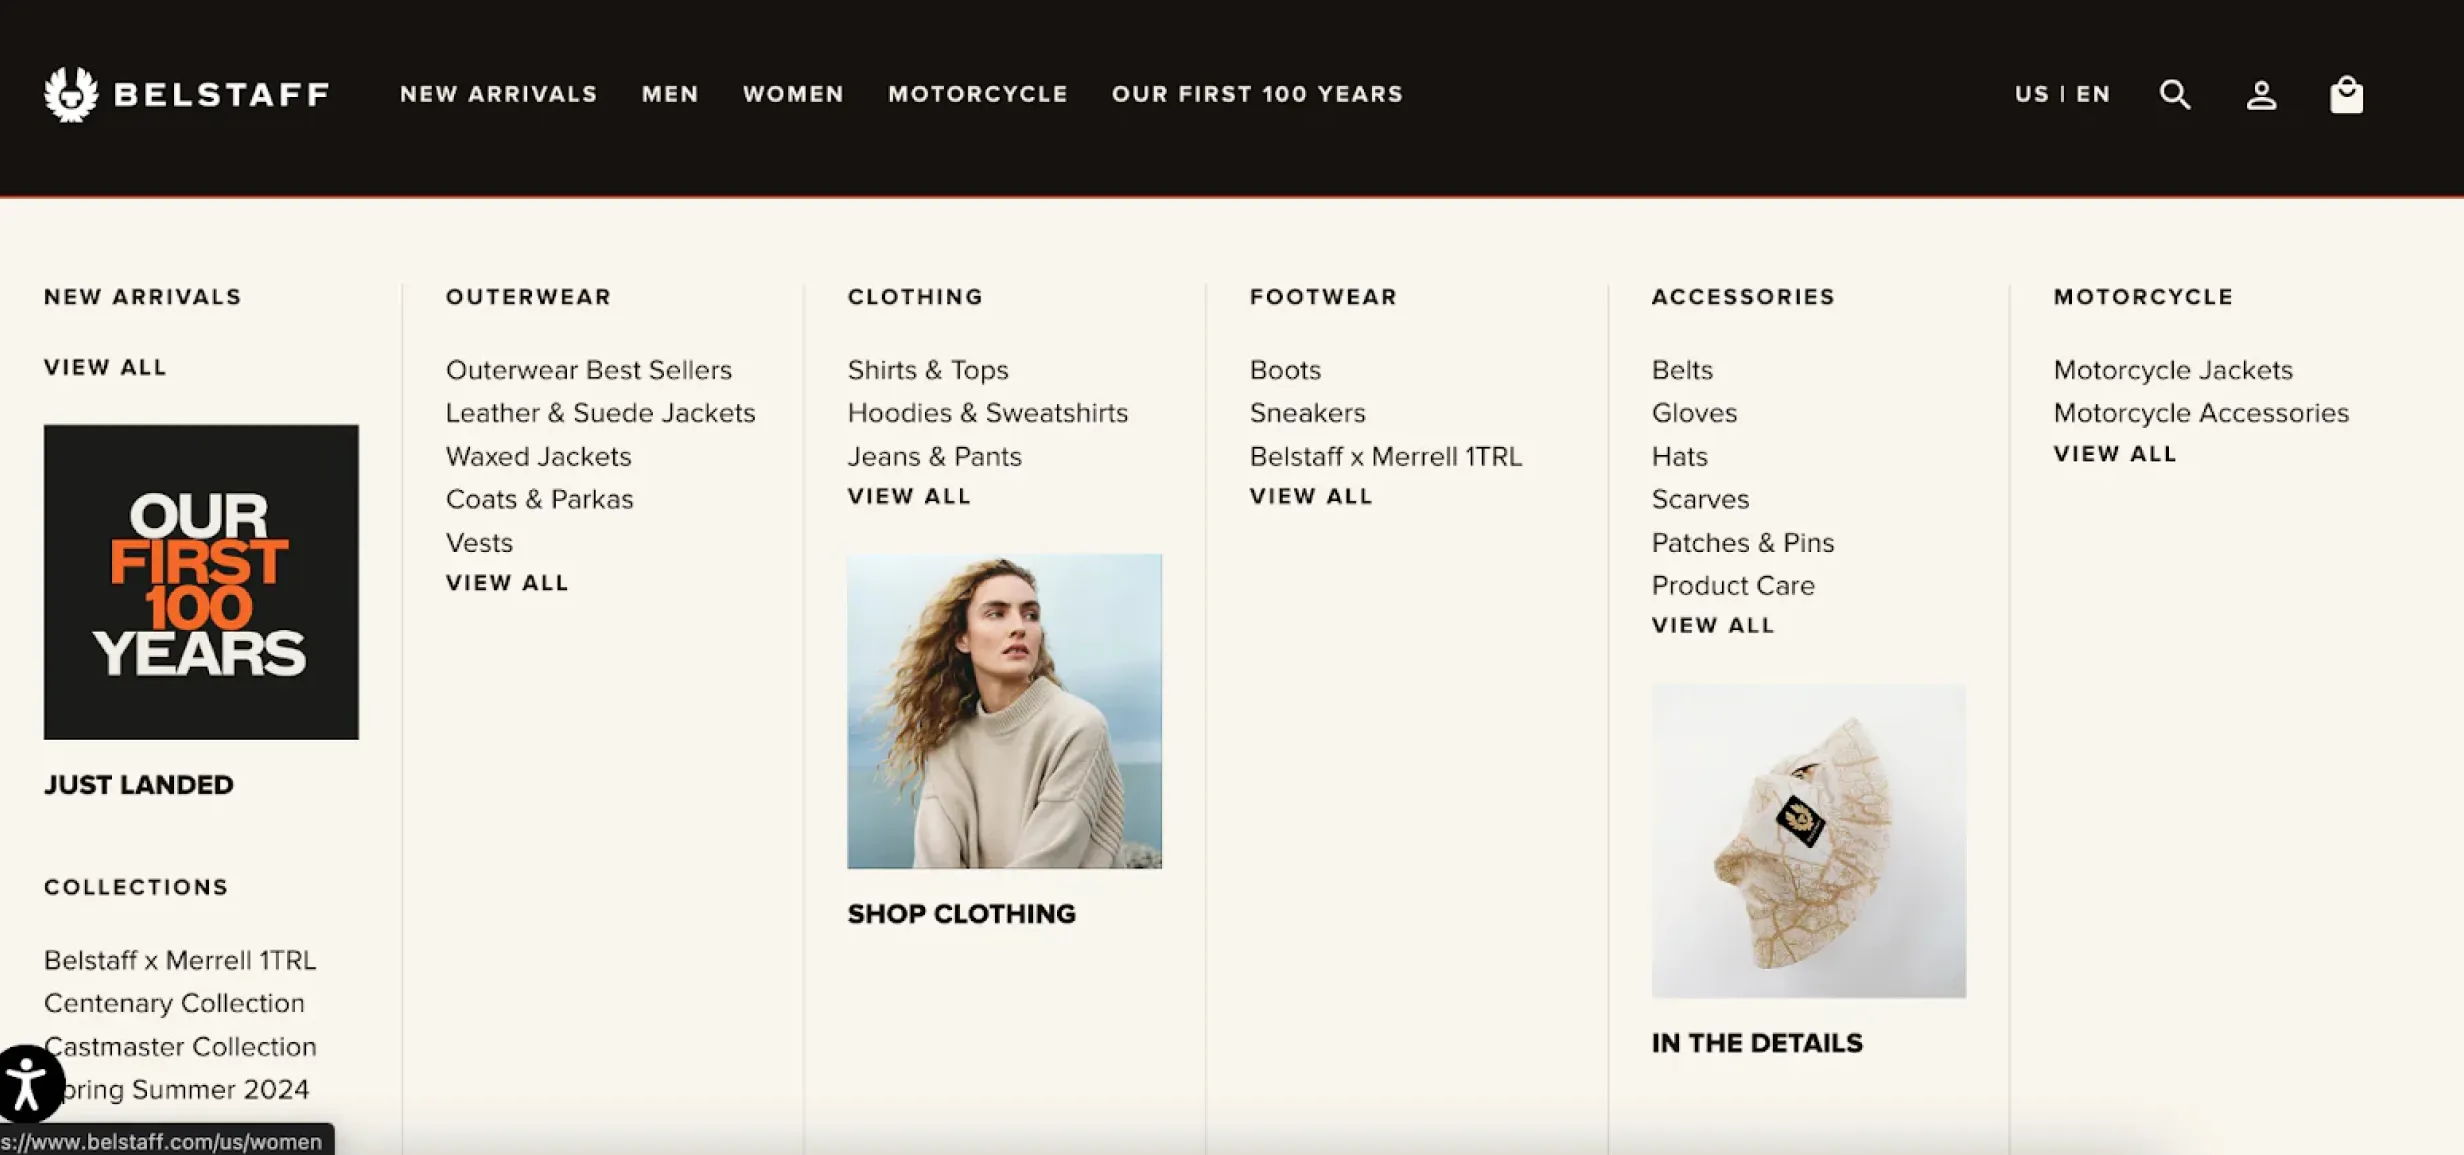
In some cases, menu items can be nested within a drop-down menu, creating a more organized structure. For instance, a menu item named "Clothing" might expand into sub-menu items like "Men", "Women", and "Kids".
1.2. Common types of Shopify menu
Shopify allows merchants to create several types of menus, each serving a unique purpose in improving navigation and enhancing the customer experience. Let’s break them down.
- Main menu: The primary navigation bar, usually found in the header, best for key pages like Home, Shop, and Contact.
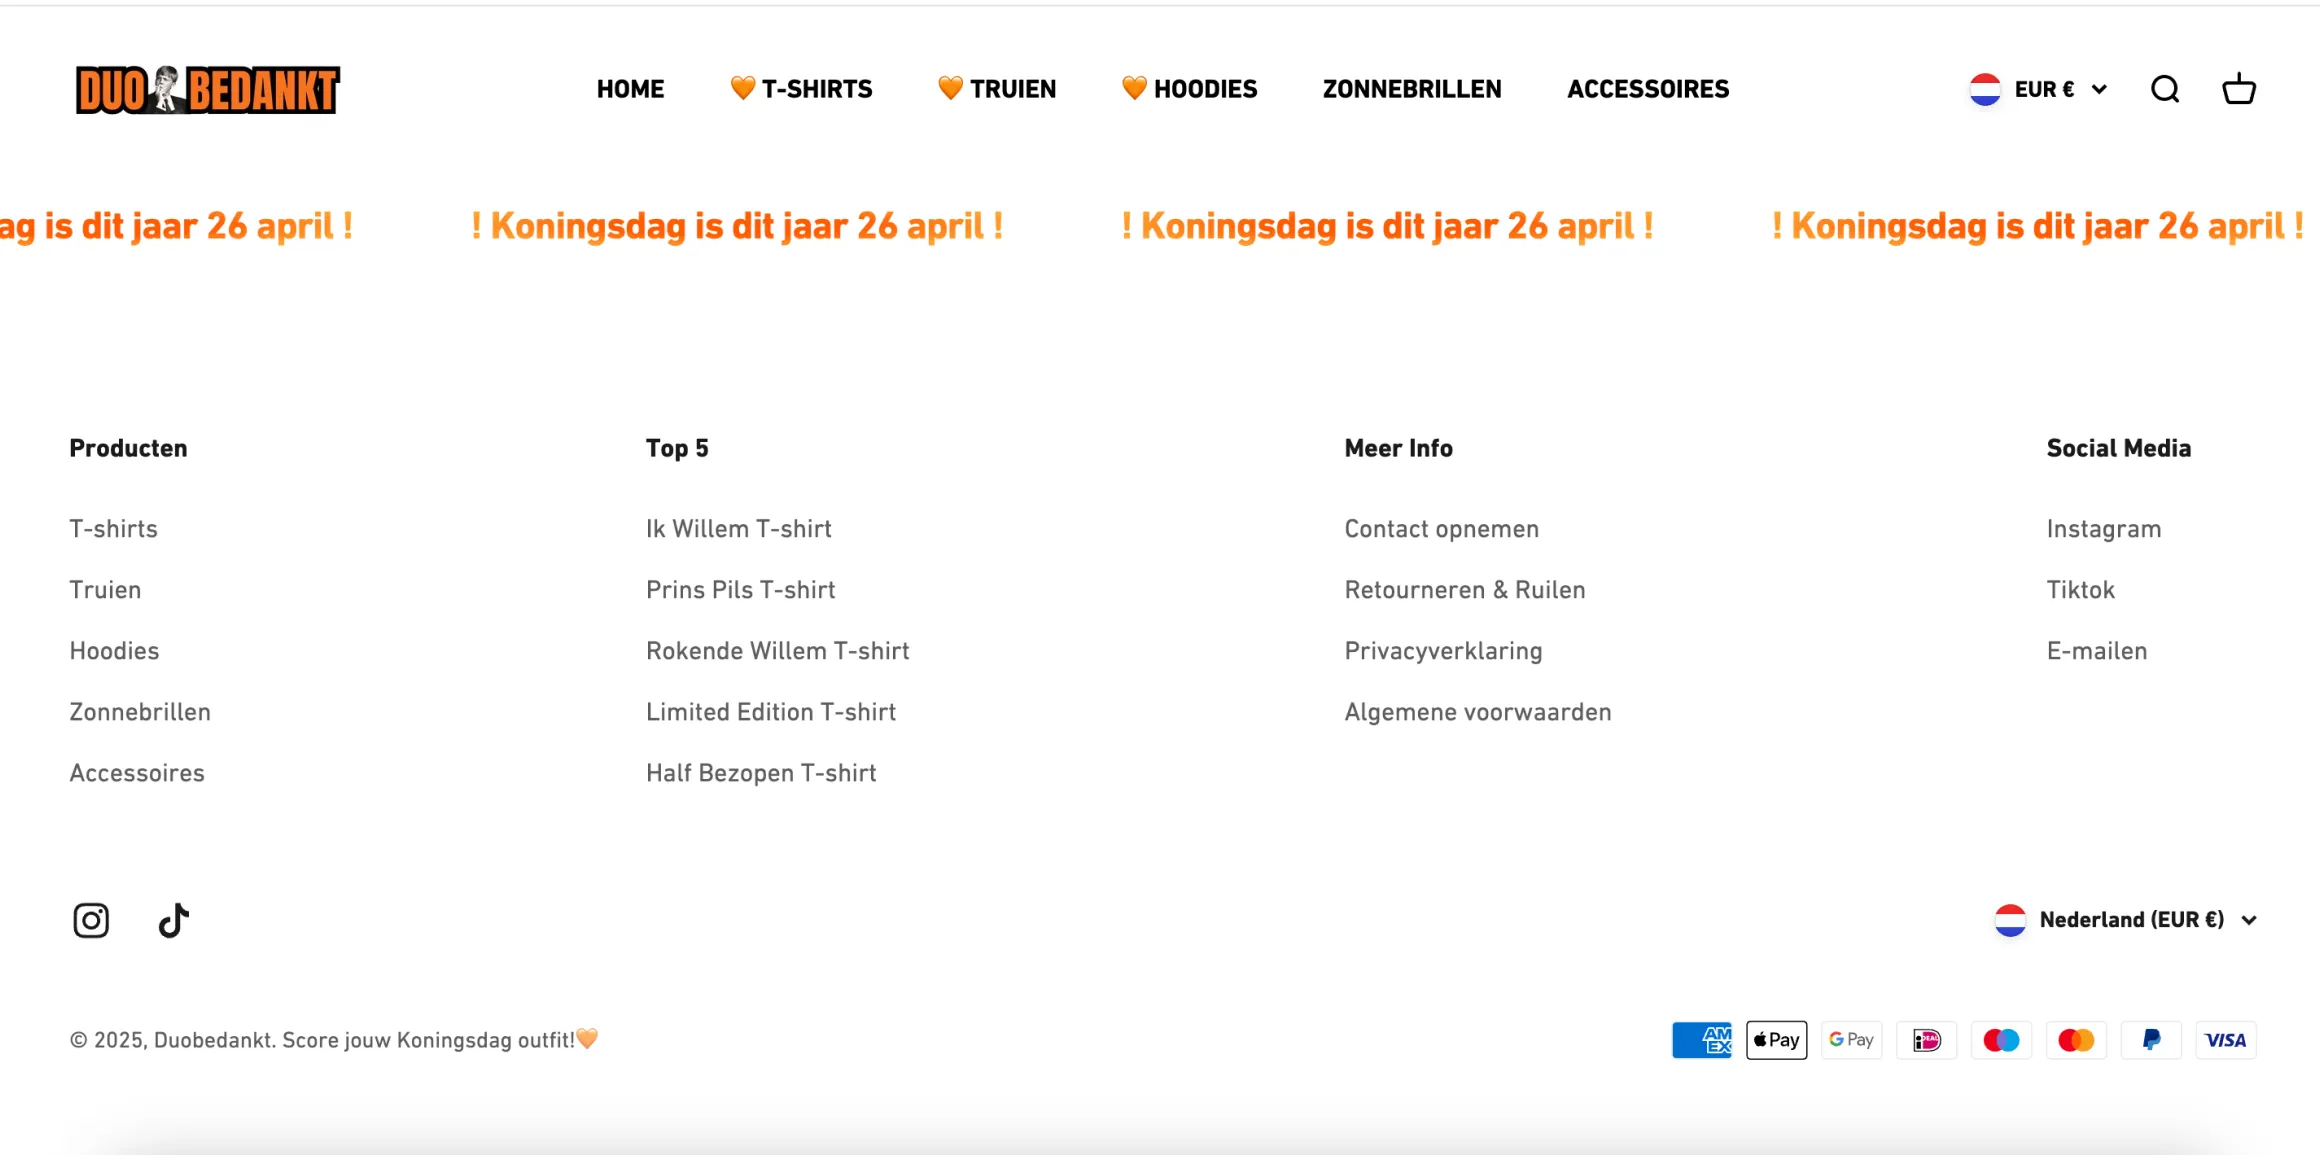
- Footer menu: Located at the bottom of the store, often used for policies, FAQs, and customer service links.
- Drop-down menus: A way to organize multiple links under a single menu item for easier navigation, ideal for stores with large catalogs.
- Customer account menu: Available for stores with customer accounts, providing quick access to order history, profile settings, and saved addresses.
1.3. What can you do with the Shopify menu?
Overall, with Shopify menus, you can:
- Add menu items: Create links to products, collections, webpages, blog posts, policies, or external websites.
- Edit menu items: Change the name or destination of existing menu items.
- Remove menu items: Delete items from your menus, which also removes any nested items in drop-down menus.
- Reorder menu items: Change the display order of menu items by dragging them to new positions.
You can manage these actions from the Menus page in your Shopify admin. This helps in organizing your store’s navigation to improve customer experience.
Now that you understand the different types of menus in Shopify, it’s time to put that knowledge into action! In the next section, we’ll walk you through how to add a menu item on Shopify, so you can start building a navigation system that enhances your store’s usability and boosts sales. Let’s dive in!
2. How to add a menu item on Shopify
To add a menu item on Shopify, you can follow these simple steps:
- From your Shopify admin, go to Content > Menus.
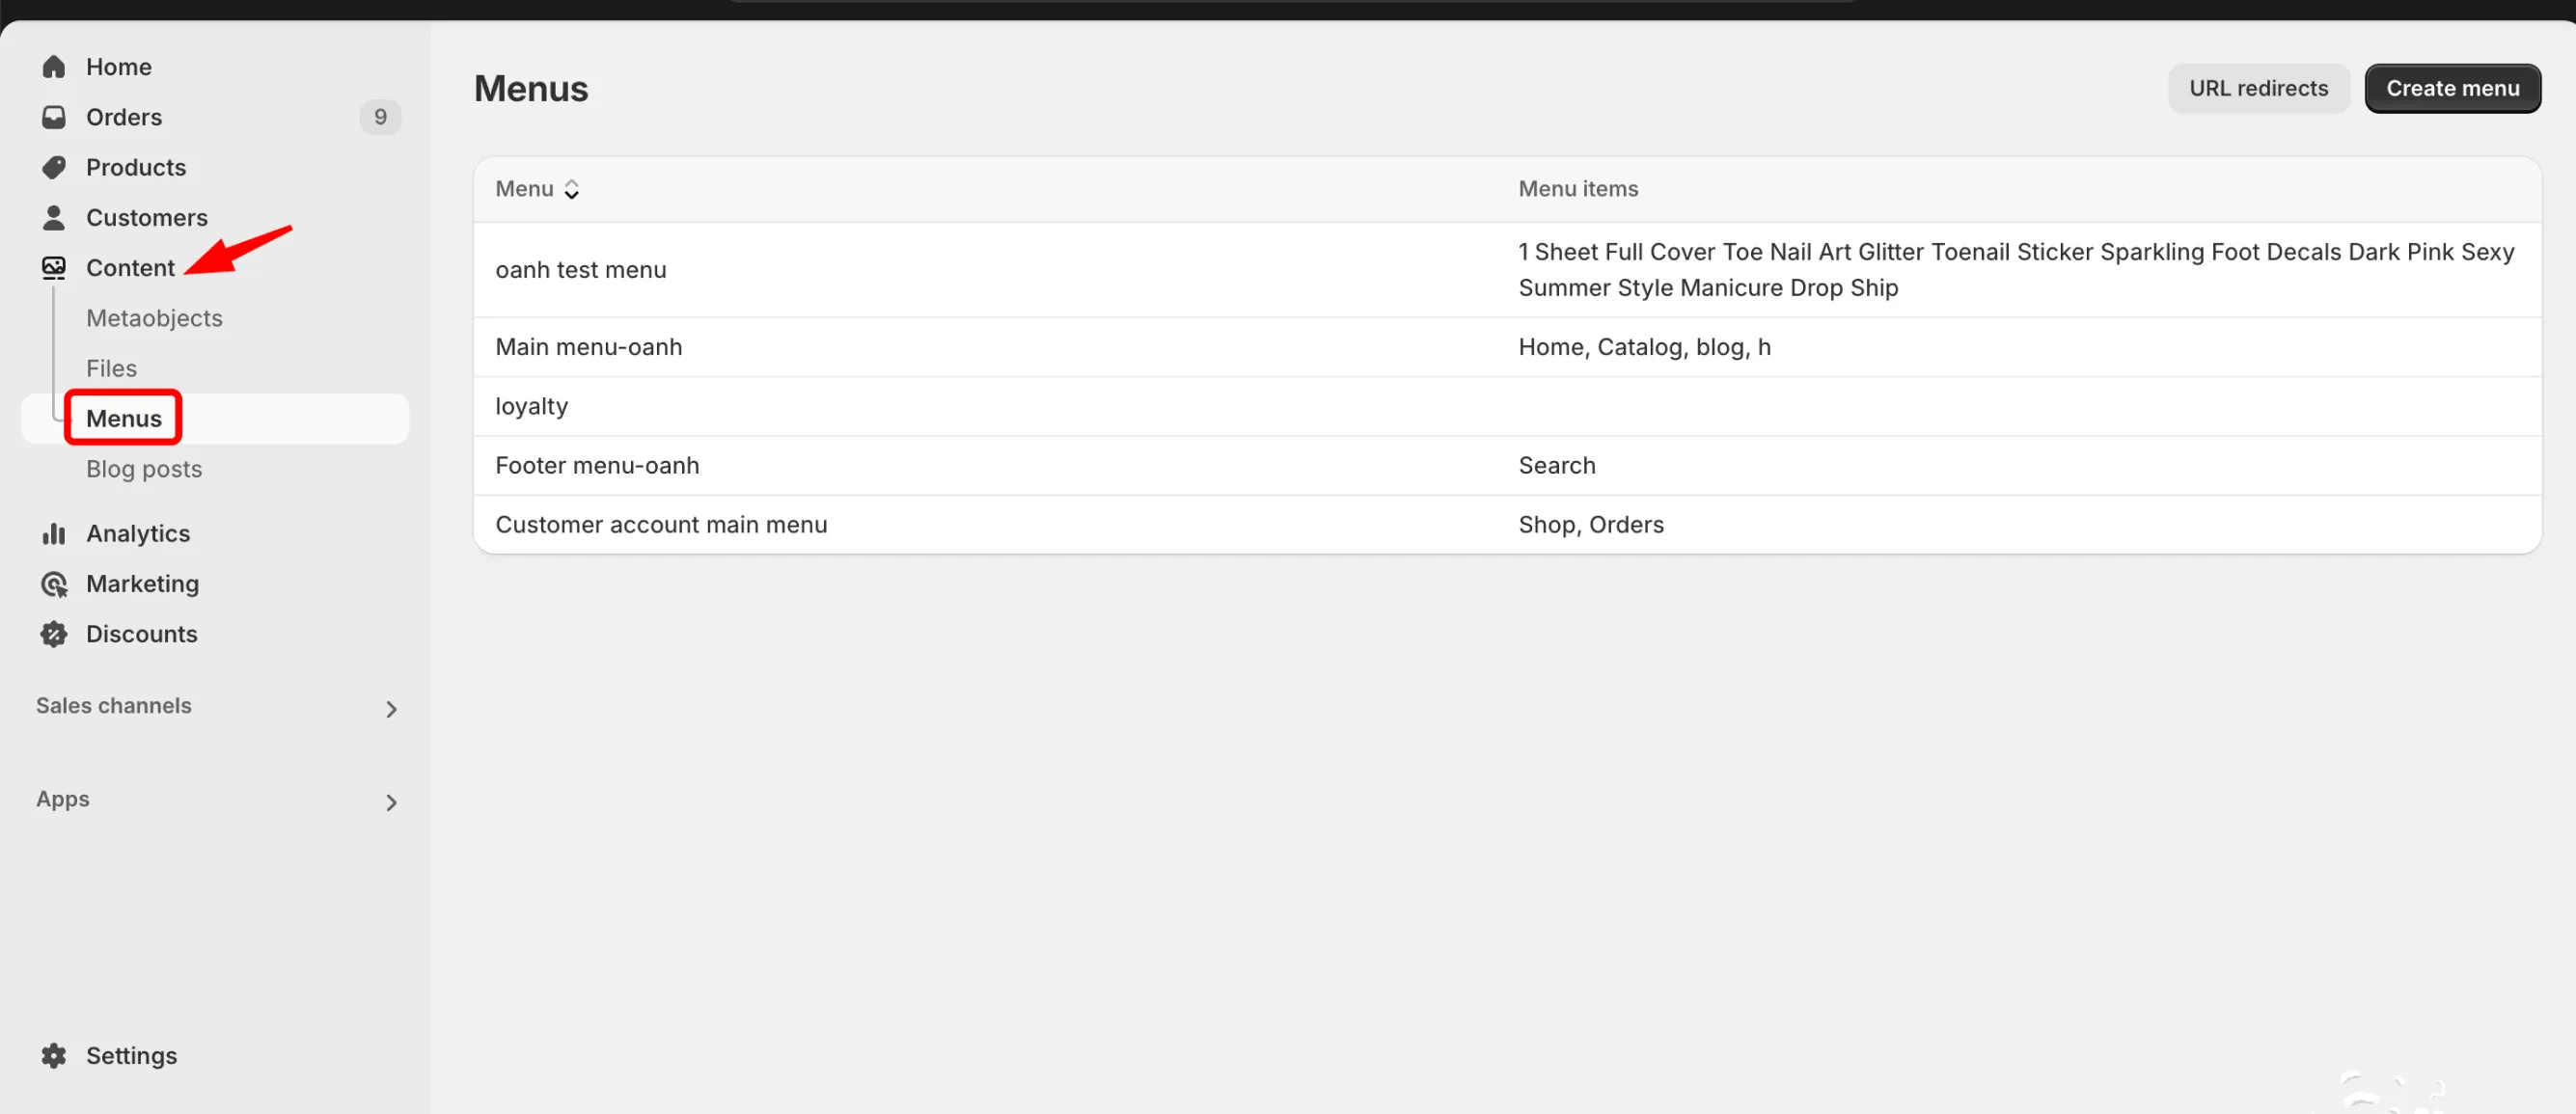
- Click the name of the menu that you want to edit.
- Click Add menu item.
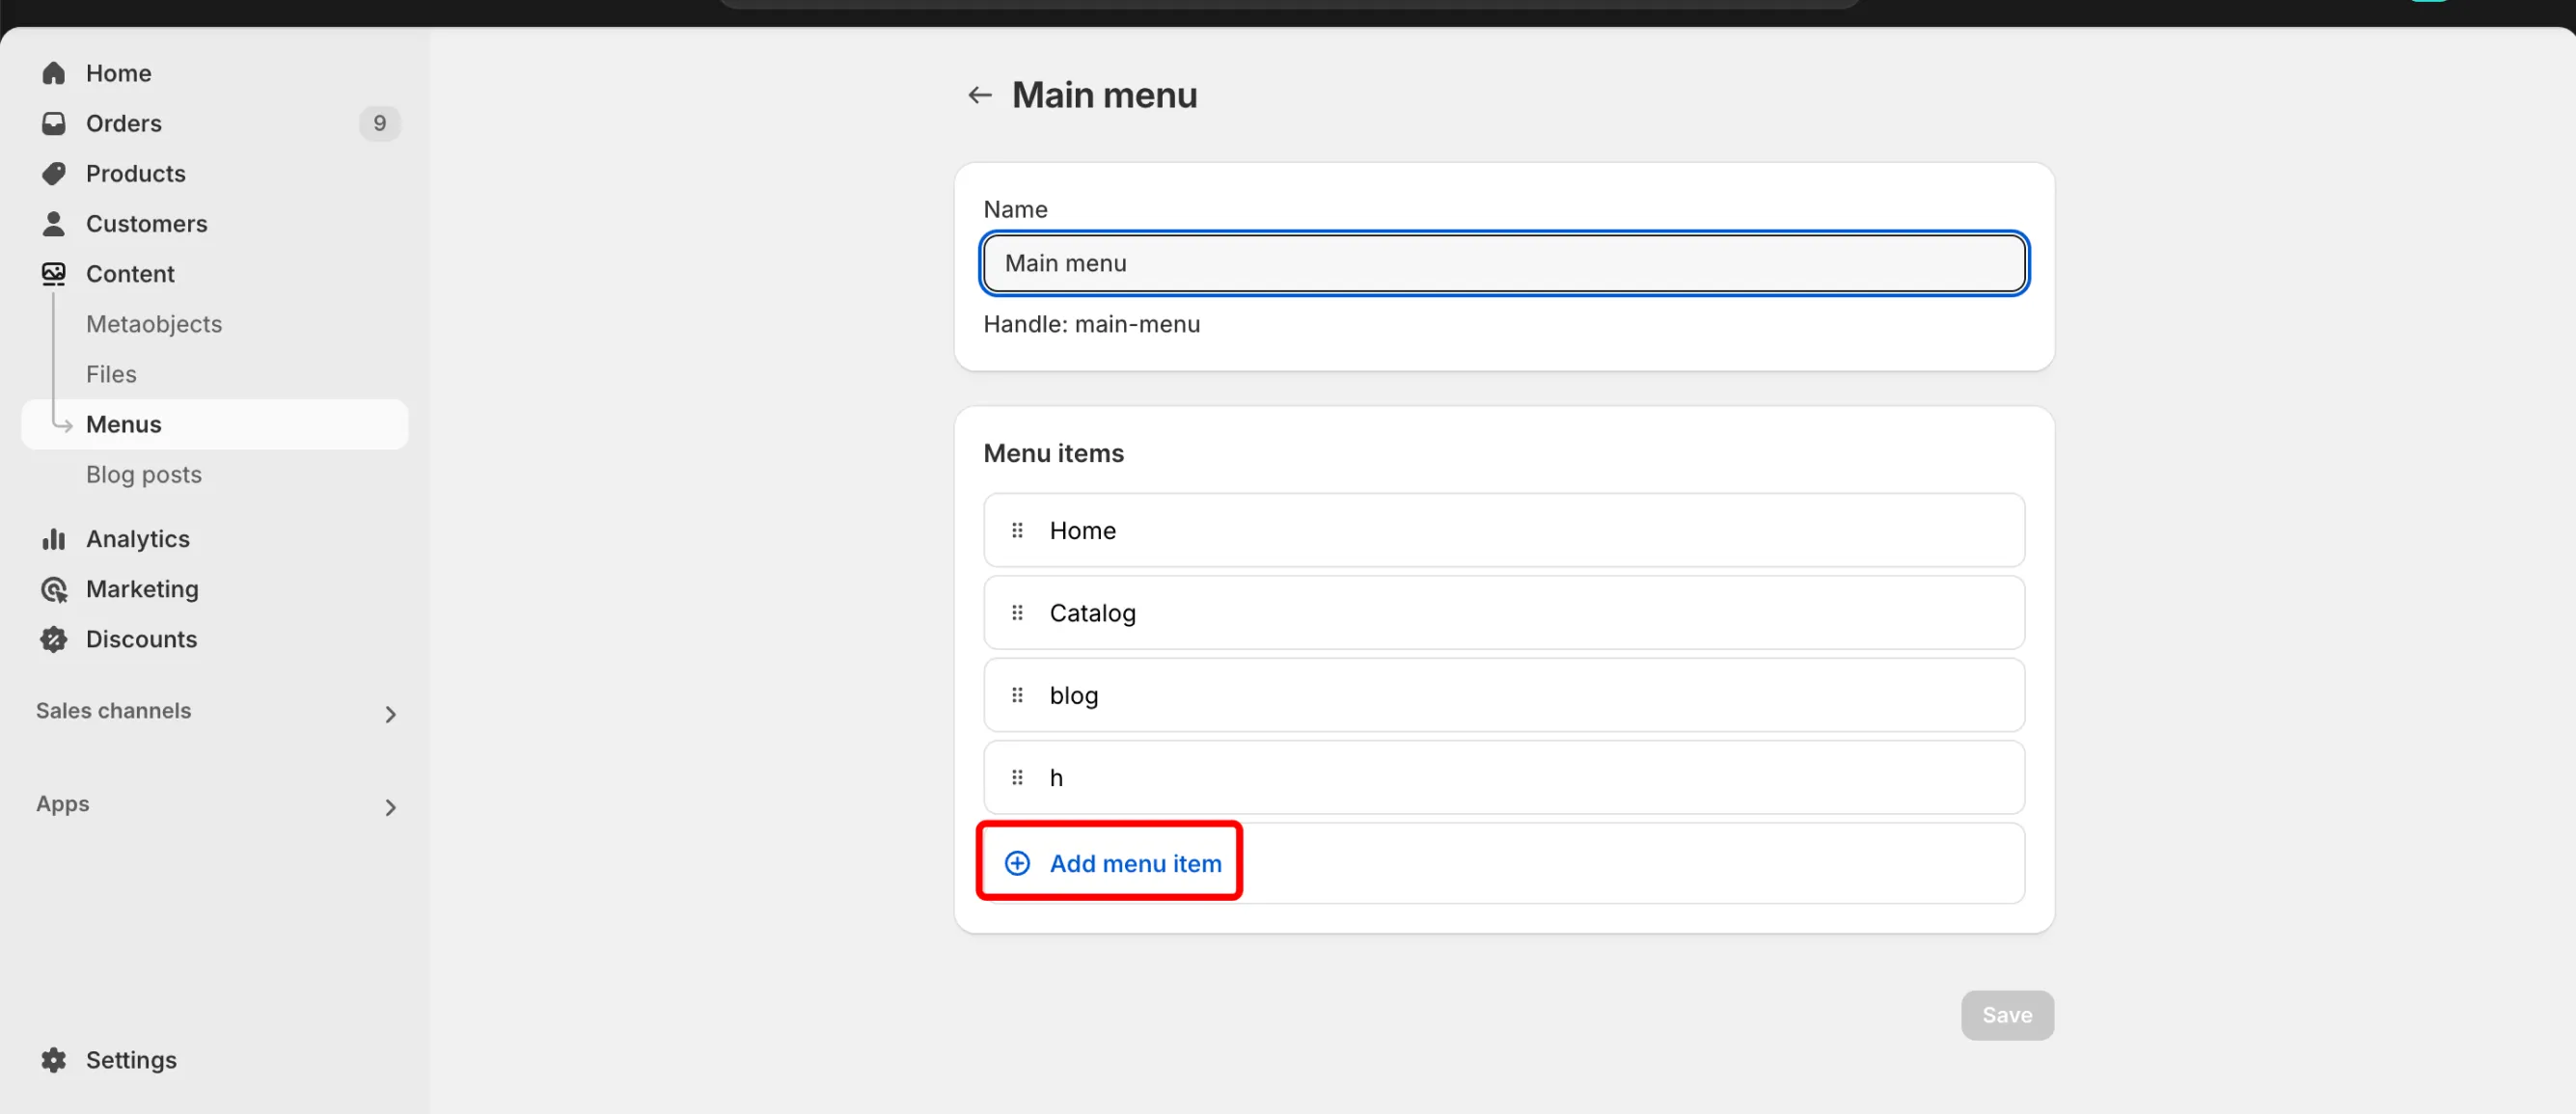
- In the Name field, enter the name of the link that you want to add. This name will display in the menu for your customers.
- In the Link field, select a link type:
- Home page links to your online store's home page.
- Collections links to all collections or a specific collection.
- Products links to all products or a specific product.
- Pages links to a specific webpage on your online store.
- Blogs links to a blog on your online store.
- Blog posts links to a specific blog post on your online store.
- Search links to a search page for your online store.
- Policies links to a policy page on your online store.
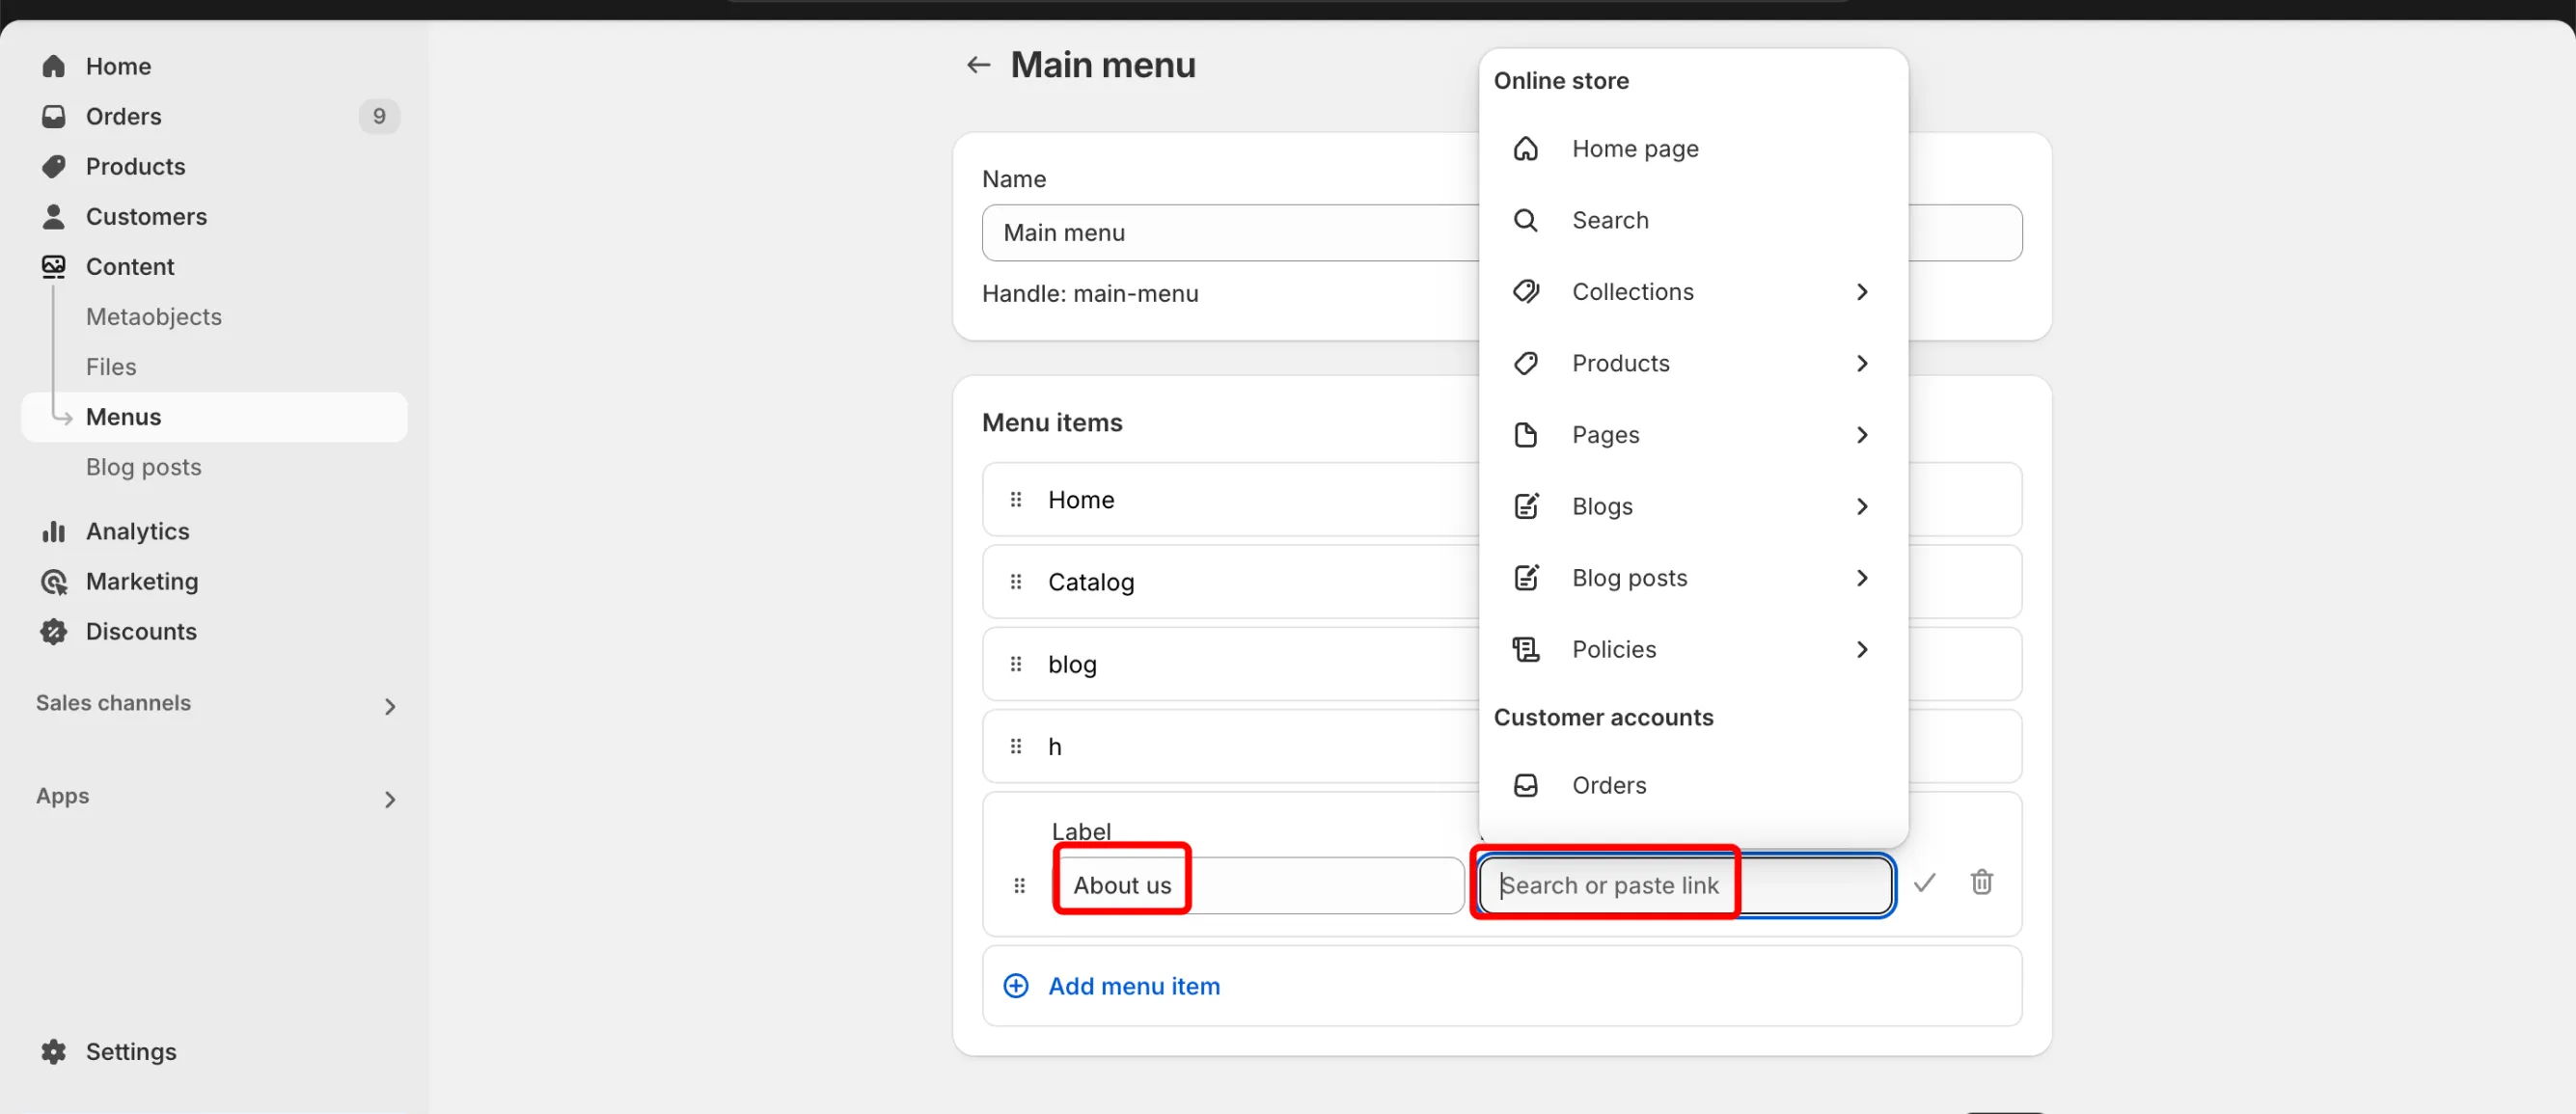
- If you choose Collections, Products, Pages, Blogs, Blog posts, or Policies, then from a drop-down menu select the specific destination that you want to add to the menu.
- Click Save menu.
Adding menu items is just the beginning! As your store evolves, you may need to rename, rearrange, or update links to keep your navigation fresh and user-friendly. In the next section, we’ll guide you through how to edit a menu item on Shopify, so you can easily adjust your store’s menus to match your business needs.
3. How to edit a menu item on Shopify
Shopify makes it easy to modify your menu whenever needed:
- From your Shopify admin, go to Content > Menus.
- Click the name of the menu that includes the item you want to edit.
- In the Menu items section, click Edit beside the name of the item.
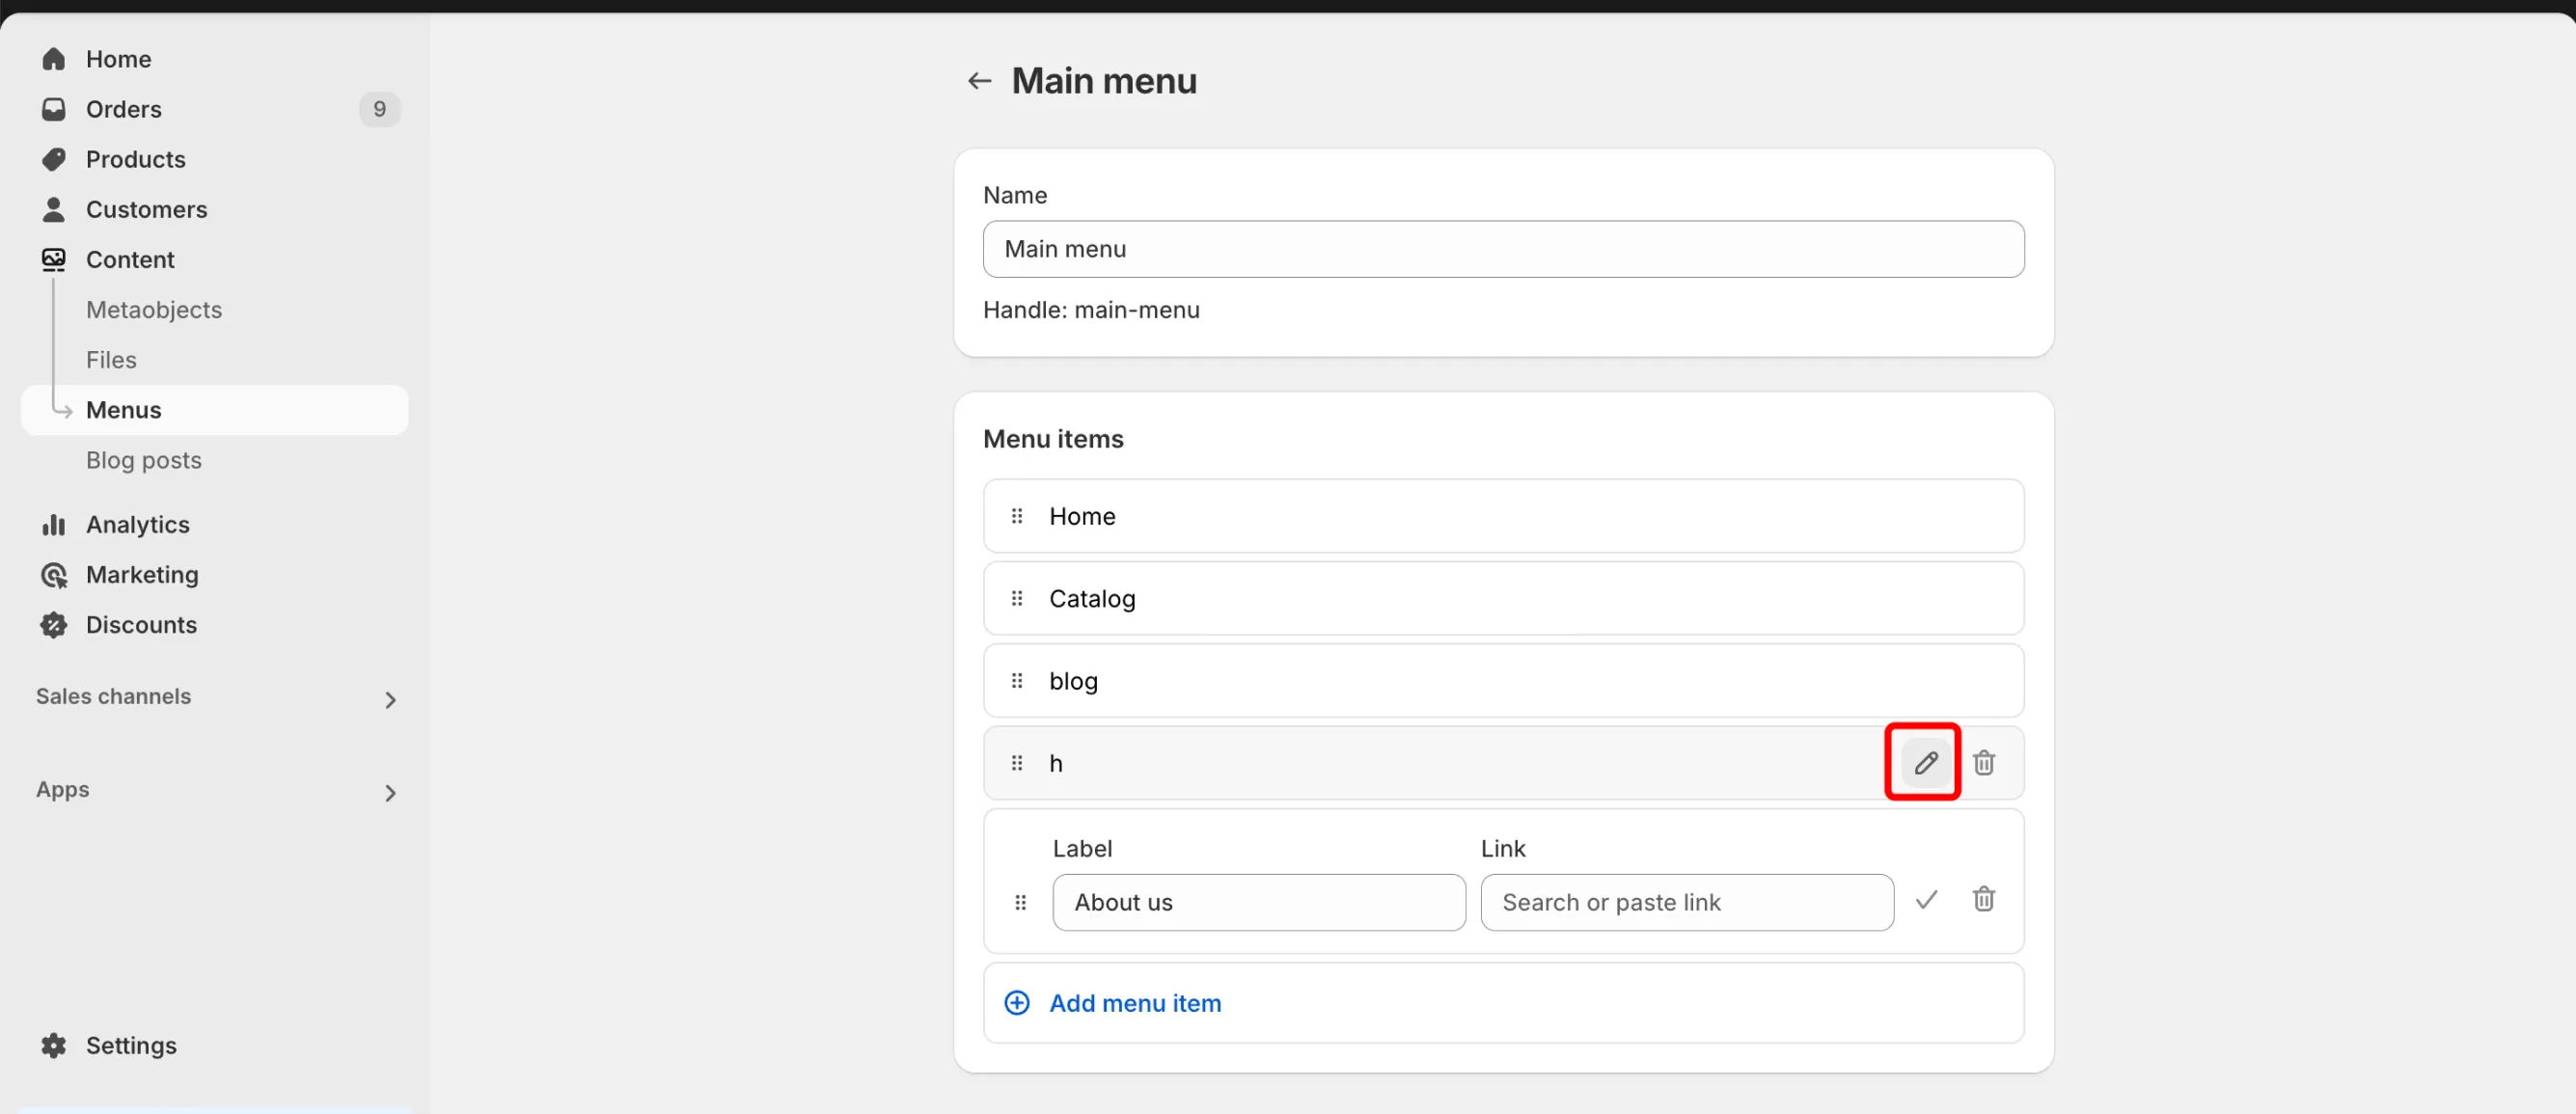
- Make any changes you need:
- To change the name of the menu item, enter new text in the Name field.
- To change the destination of the menu item, click the x next to the link field, and then enter or select a new destination.
- Click Apply changes.
- Click Save or Save menu.
If you need more advanced menu features, such as mega menus, icons, images, or multi-level dropdowns, Shopify apps can help. Popular apps for menu customization include:
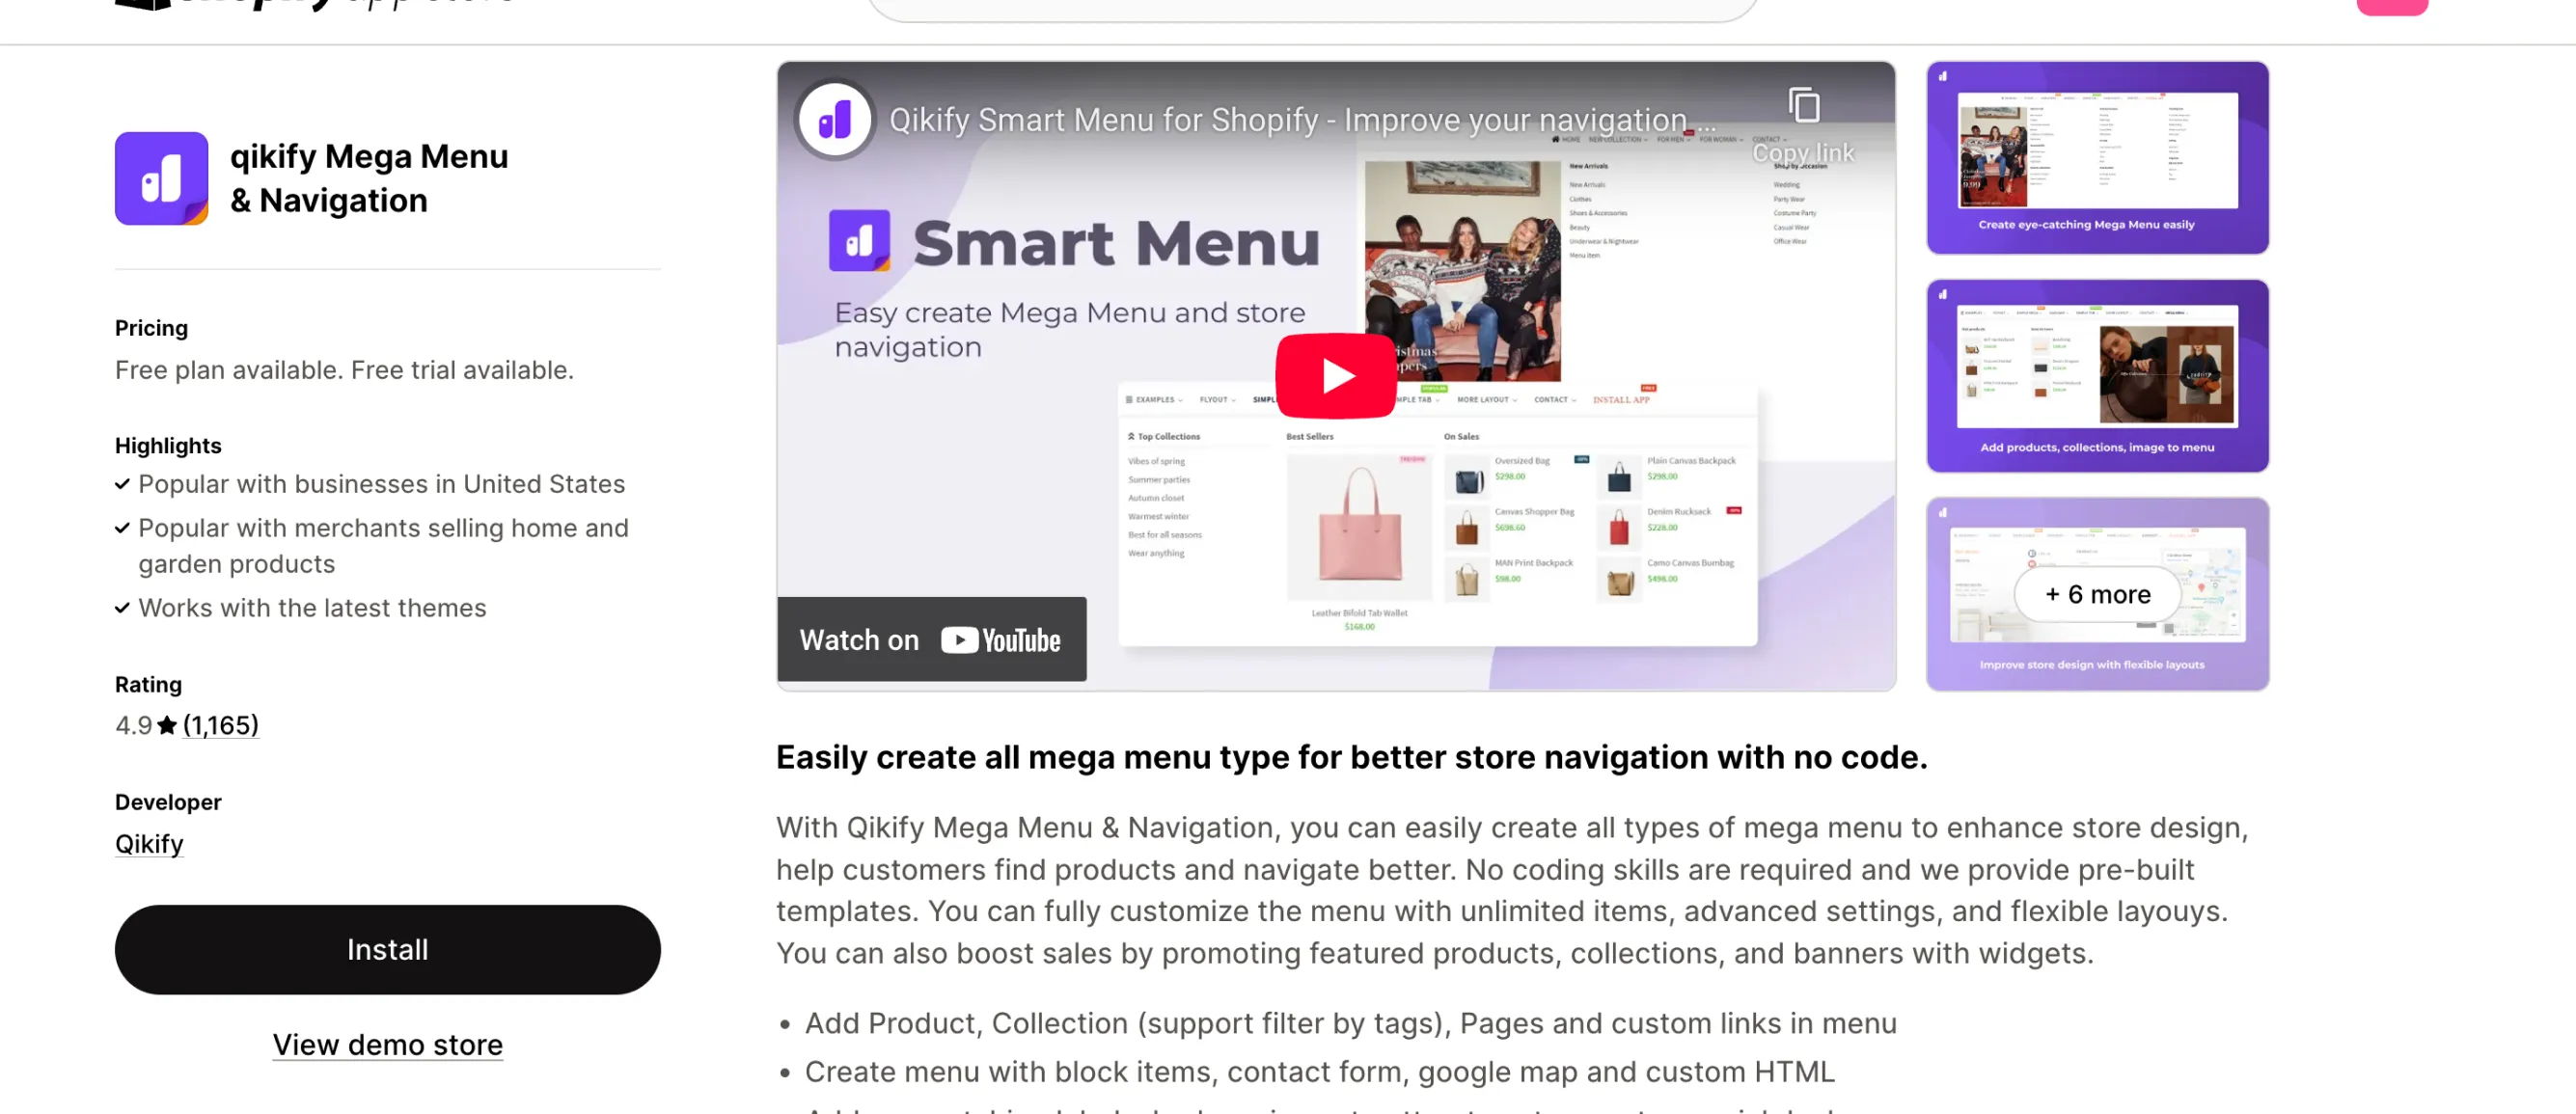
- Qikify Mega Menu & Navigation: A Shopify menu app to improve user experience with customizable navigation styles.
- Meteor Mega Menus: Create beautiful a Shopify menu with images and dynamic layouts.
- Buddha Mega Menu: Add flexible dropdowns and advanced styling options.
These apps offer more Shopify menu design flexibility beyond Shopify’s built-in menu options.
4. Remove the drop-down icon from Shopify navigation menu
To remove the drop-down icon from a Shopify navigation menu, you need to access your theme's code and modify the CSS that controls the arrow or icon associated with the drop-down functionality, usually by adding a style to hide or remove the specific element responsible for displaying the icon.
If you're looking for more flexibility beyond Shopify navigation menu code CSS changes, third-party apps can help you customize, redesign, or completely revamp your Shopify store’s navigation. These apps allow you to remove icons, add custom styling, and enhance the overall user experience.
They provide an easier way to adjust your store’s navigation without diving into code, making them ideal for merchants who prefer a no-code solution.
5. How to create a drop-down menu in Shopify
To create a drop-down menu in Shopify, you can follow these steps:
- From your Shopify admin, go to Content > Menus.
- Click the name of your main menu.
- Choose one of the main menu items to be the header for your drop-down menu, or add a new menu item to be the header. If you don't want the header to link to anything, enter # in the Search or paste a link field for the header menu item.
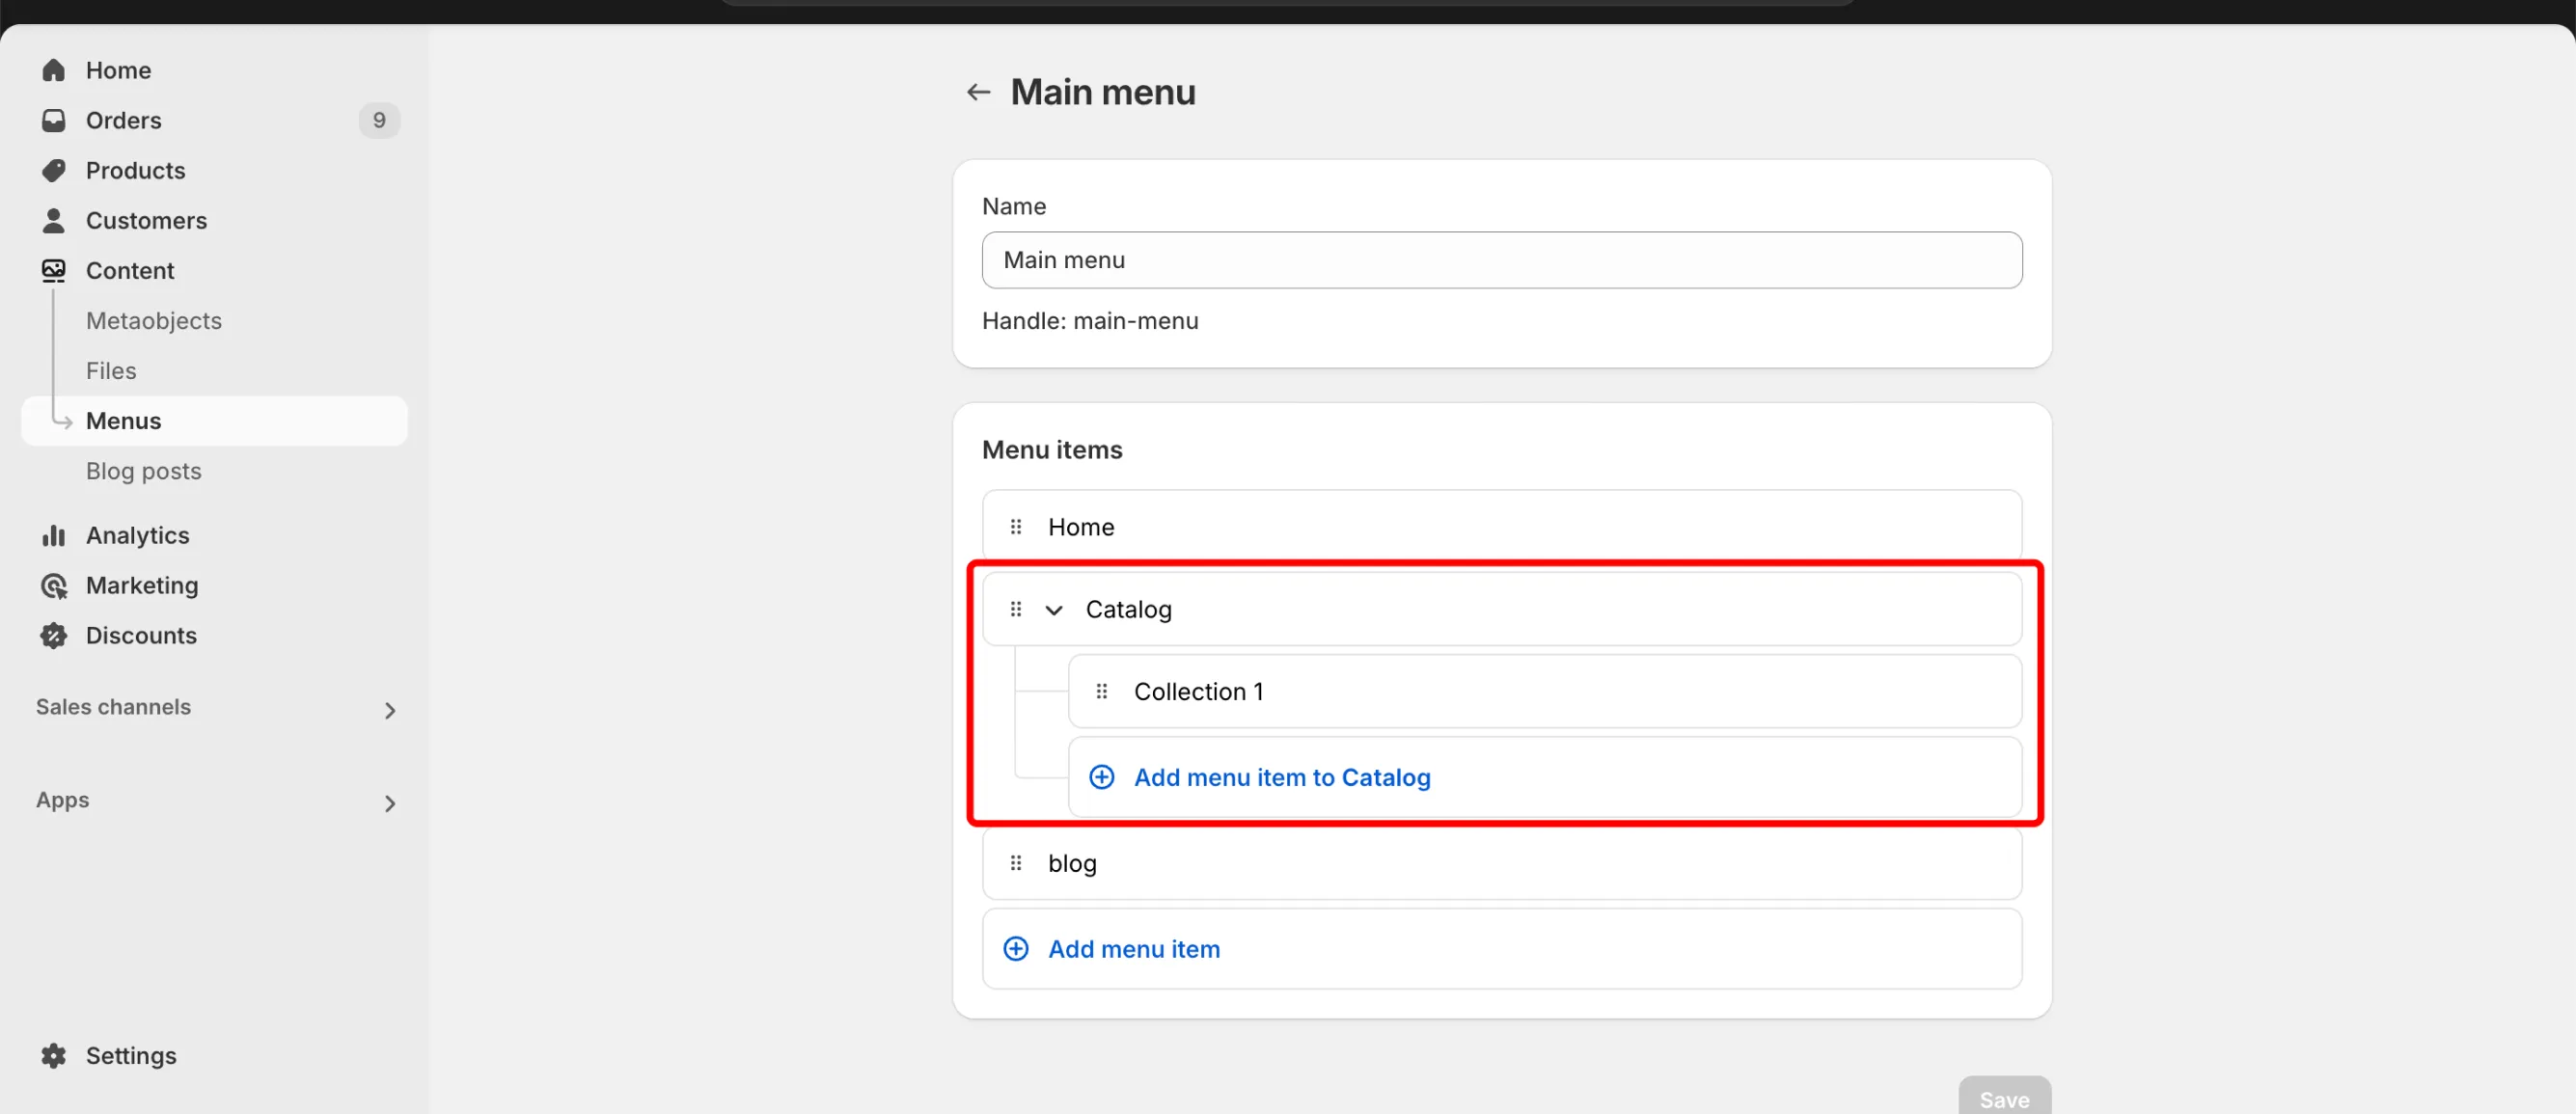
- To add a menu item to include in the drop-down menu, complete the following tasks:
- Click Add menu item.
- In the Name field, enter a name for your menu item.
- In the Search or paste a link field, enter or select a destination for your menu item.
- Click Add, and then click and drag the menu item to nest it below the header menu item.
- Click Save menu.
While Shopify’s default menu settings allow you to create simple drop-downs, third-party apps can help you take your navigation to the next level with mega menus, multi-column layouts, images, and icons.
You can take a look at these choices:
- Qikify Mega Menu & Navigation: Provides a structured, organized navigation experience for stores with large catalogs.
- Globo Mega Menu: Allows you to build stylish, interactive drop-downs with animations and icons.
- Navi+ TabBar/Mega Menu Builder: A powerful tool for designing custom Shopify menu bar and mega menus with advanced styling options.
These apps help you design a professional, visually appealing menu without touching code, making navigation more engaging for your customers.
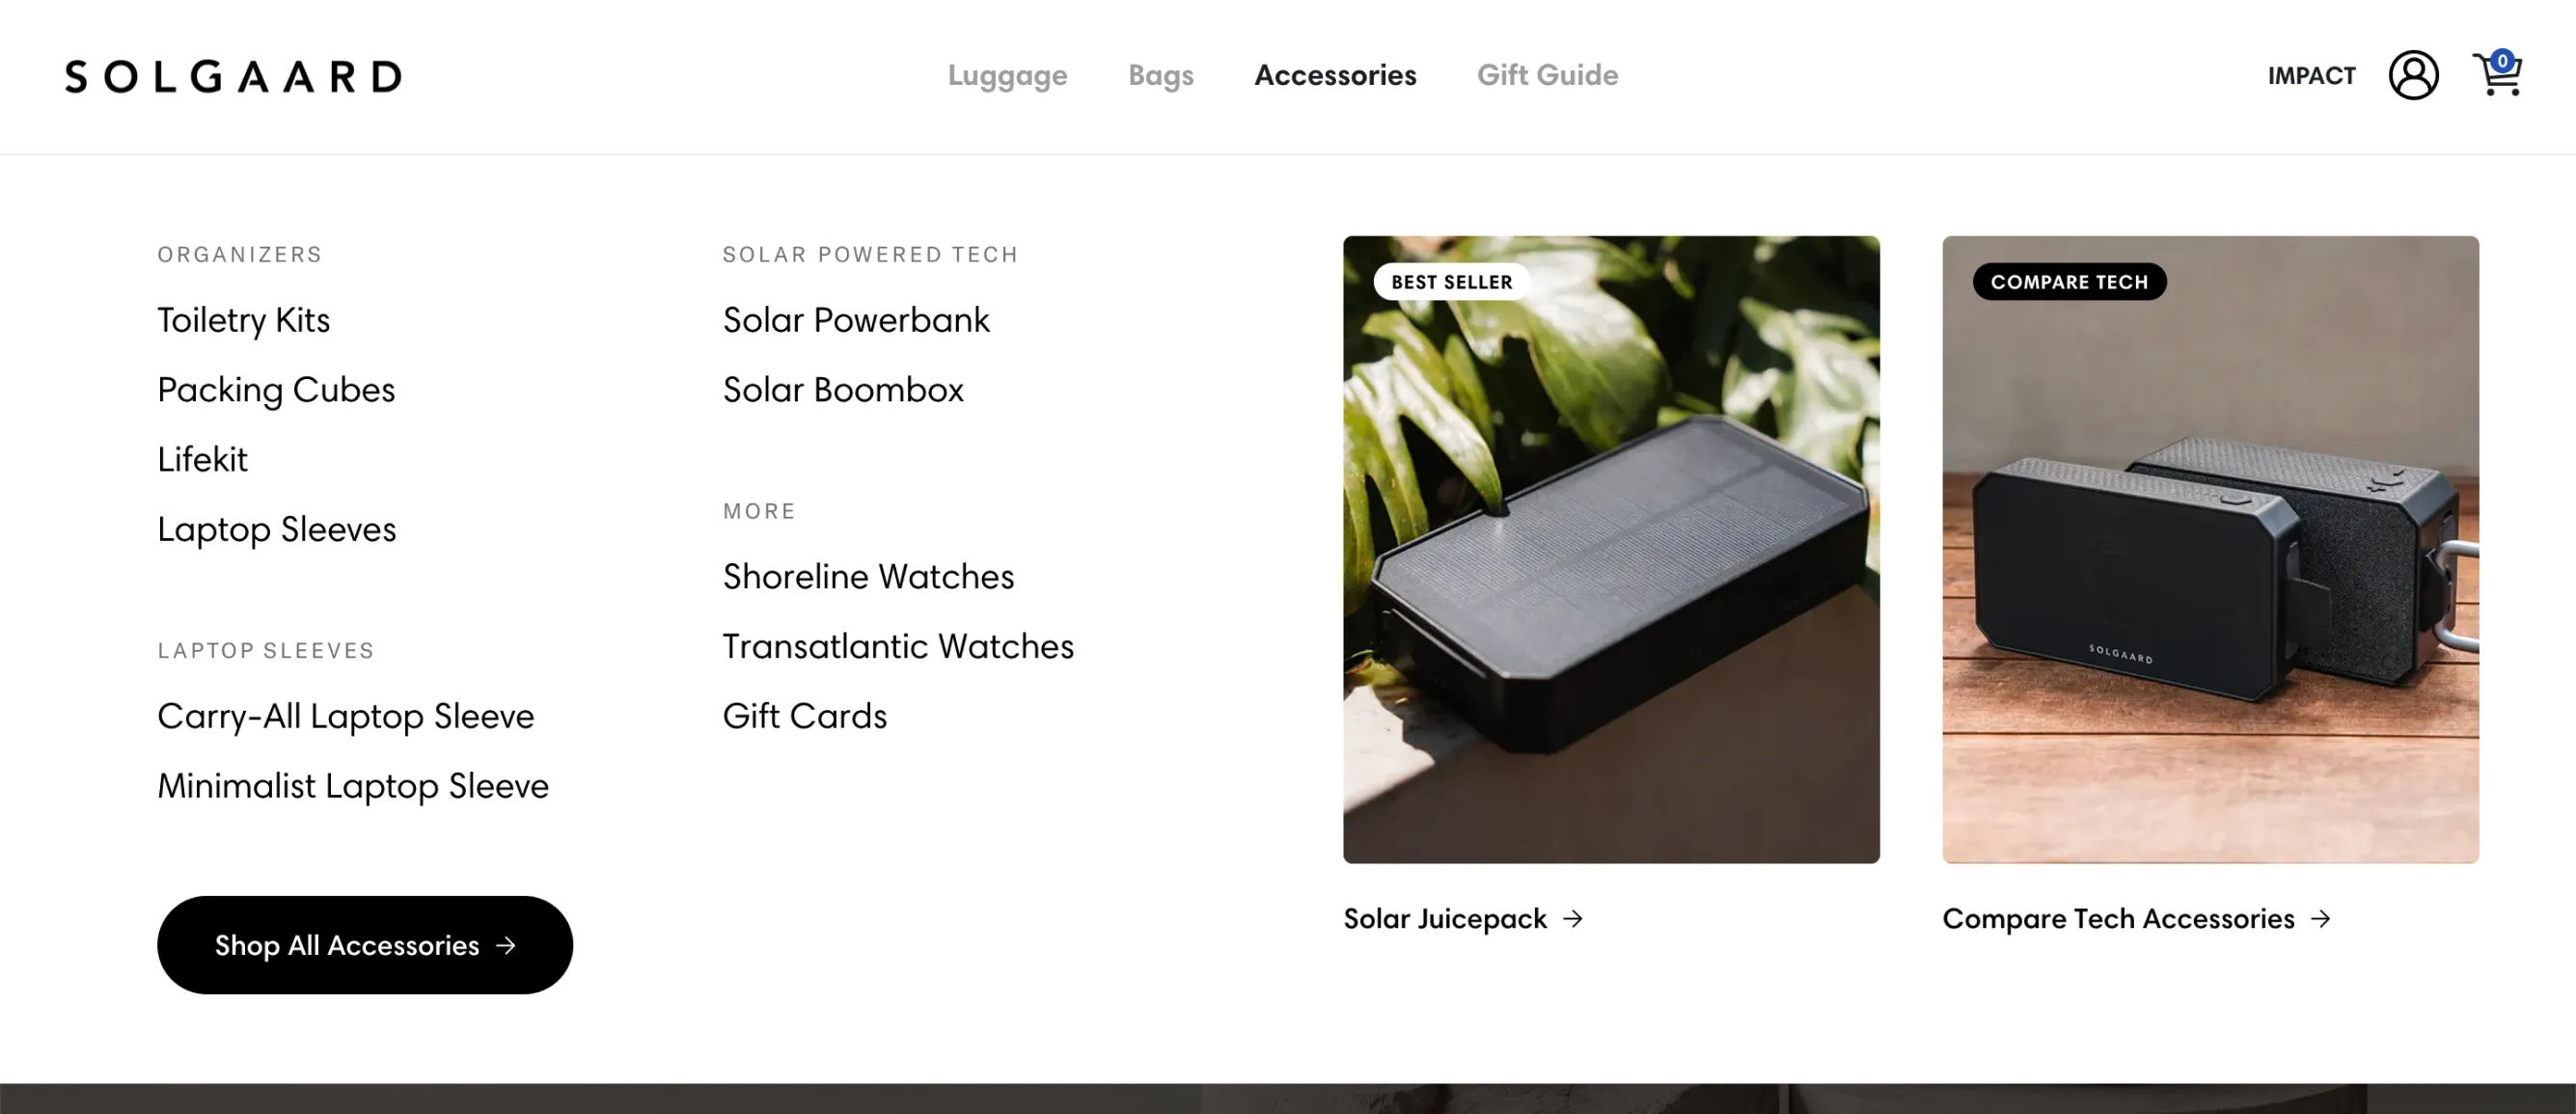
6. How to add images and collections in the mega menu Shopify
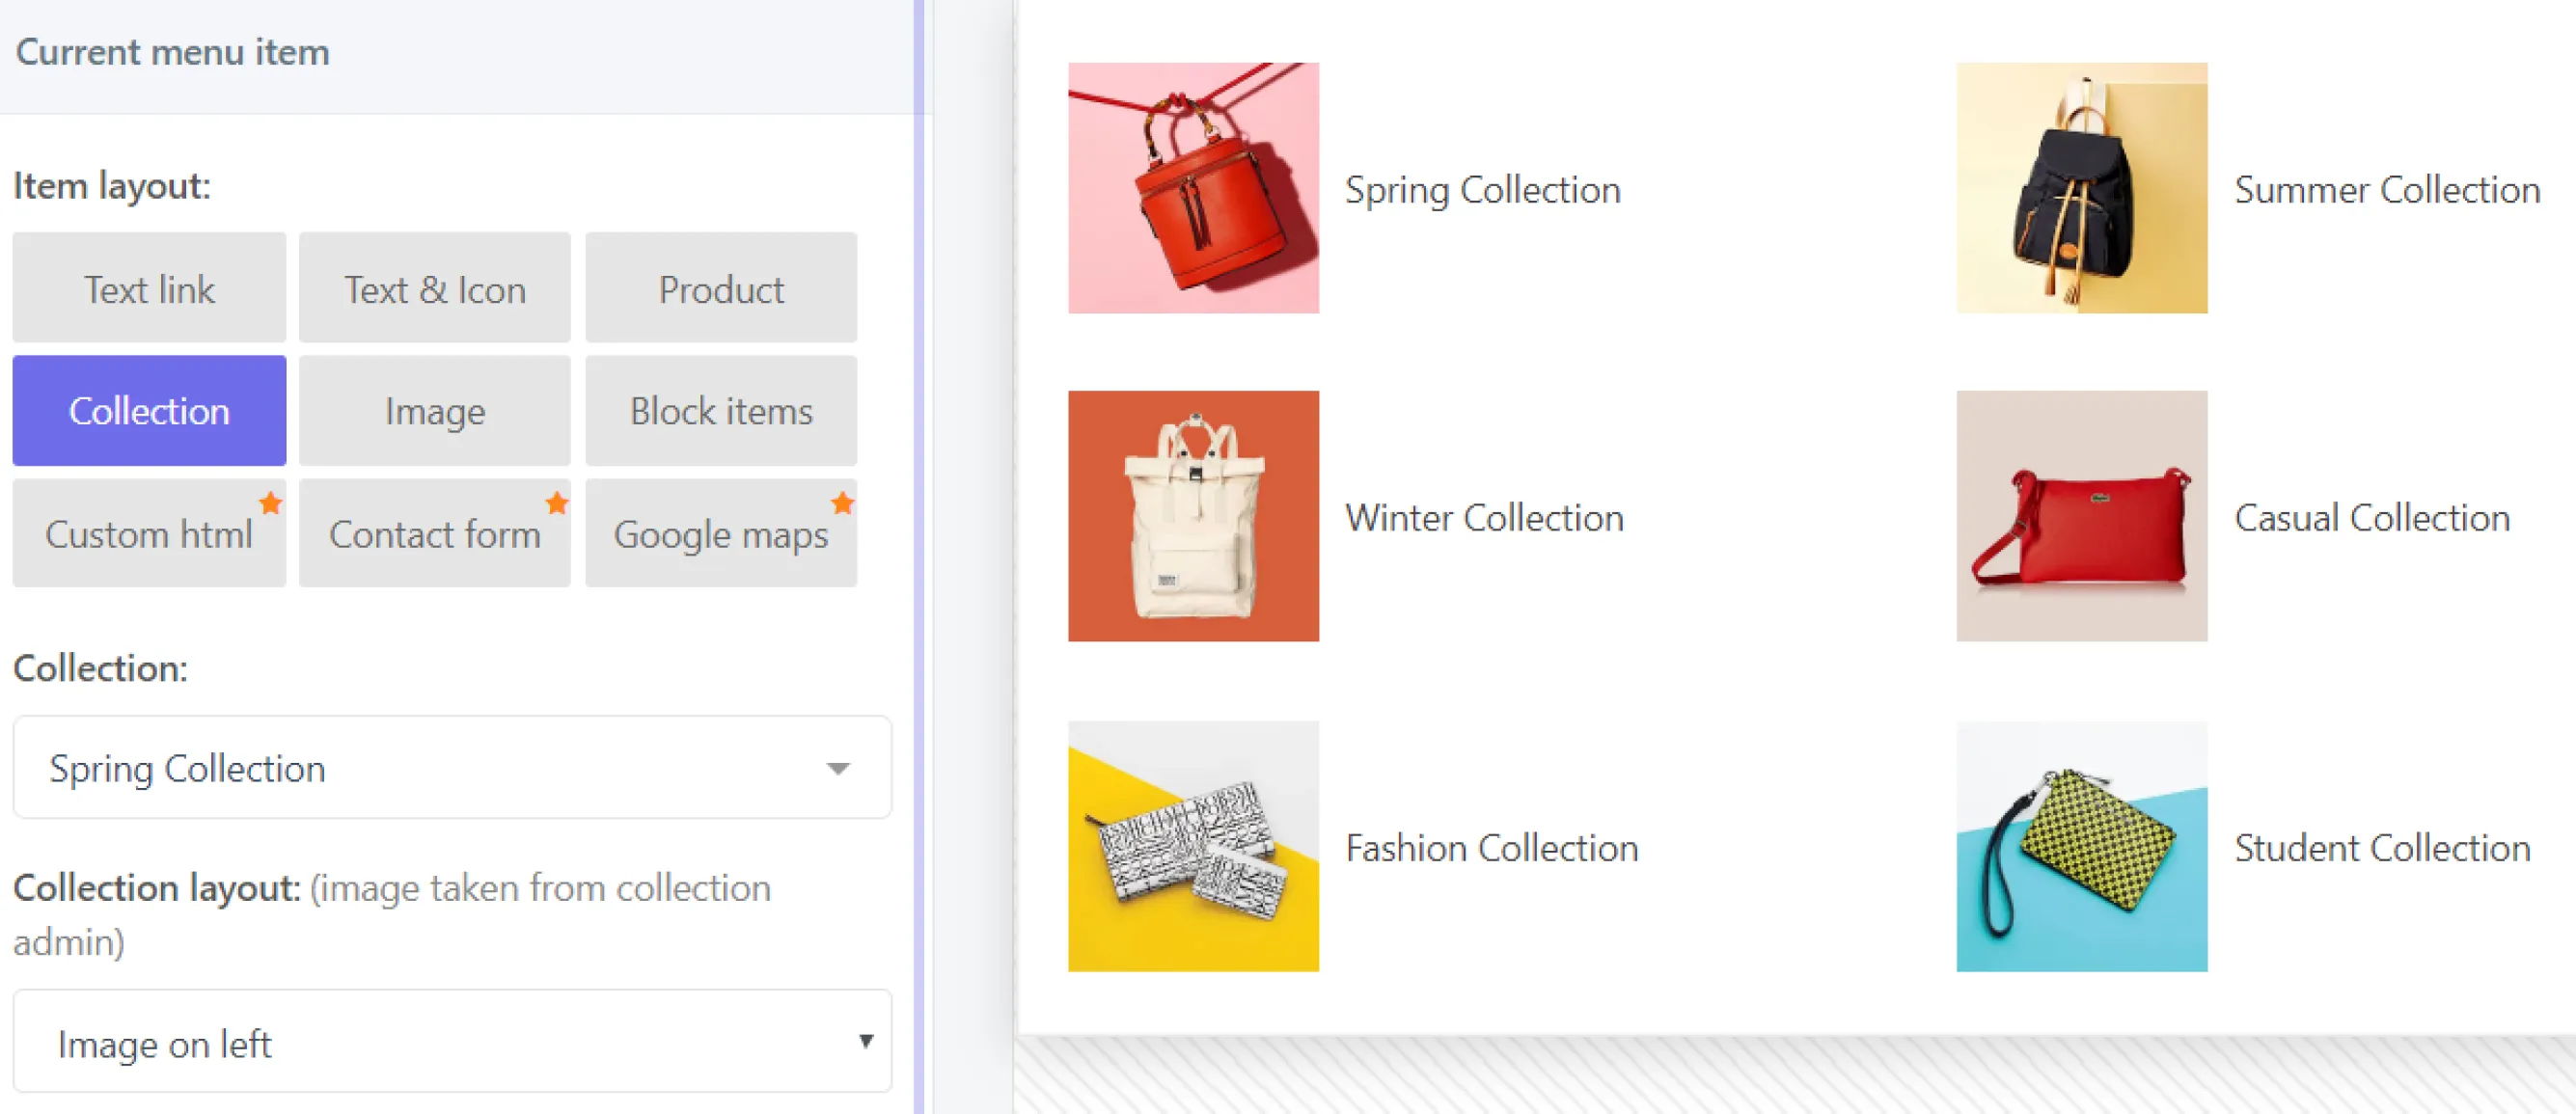
A mega menu is a powerful navigation feature that helps organize a large number of links into a visually appealing layout. Adding images to your mega menu can enhance user experience, highlight key collections, and make navigation more intuitive.
In addition, collections help group related products together, making it easier for customers to browse your store. You can add collections to your navigation menu to direct shoppers to specific product categories.
If your theme supports custom coding, you can manually add images to your mega menu Shopify by modifying the Liquid and CSS files.
However, If you're not comfortable editing code, Shopify apps provide an easier way to add images to your mega menu. And also, these apps encourage you to create a more visually enhanced collection menu with images or advanced layouts.
Simply install a mega menu app Shopify, follow the setup guide, and use the built-in tools to showcase your Shopify menu dynamically, making it easier for customers to browse your store, why not?
7. Shopify menu mastery: Elevate your store navigation
A well-structured Shopify menu is essential for improving navigation, enhancing the shopping experience, and guiding customers to the right products and pages. Whether you're setting up simple drop-down menus, adding images, or organizing collections, optimizing your store’s navigation can boost engagement and sales.
By using Shopify’s built-in tools or third-party apps, you can create a seamless and visually appealing menu tailored to your store’s needs. Take the time to refine your menu structure, and your customers will thank you with better browsing and higher conversions!


