Shopify Forms Made Simple: A Step-by-Step Guide

Written by: Hannah

Topics: eCommerce Tips

Published: August 9, 2024

13 minutes read

Shopify forms

In the bustling world of eCommerce, every customer interaction is a golden opportunity. Shopify forms serve as digital storefronts, transforming potential customers into leads, subscribers into loyal patrons, and feedback into business improvements. This guide is your blueprint for crafting Shopify forms that not only capture information but also captivate your audience. 


Whether you're troubleshooting a Shopify contact form not working, fine-tuning your Shopify contact form email settings, or addressing issues with your Shopify contact form not sending emails, we've got you covered. 


Let's dive in and unlock their full potential for your online store!

1. A Thorough Understanding of Shopify Forms: Definition, Types and Benefits

1.1 What are Shopify Forms?

Shopify forms are essentially online versions of traditional paper forms. They are interactive elements on a Shopify website that allow users to input data, which is then collected, processed, and stored electronically.


Forms are an indispensable component of any successful Shopify store. They provide a direct channel of communication with customers, enabling you to collect valuable data, enhance customer experience, and drive sales.

1.2. Why do merchants need Shopify forms for their stores?

Shopify forms are more than just digital contact points; they are powerful tools that can significantly impact your business. By effectively utilizing forms, you can enhance customer experiences, gather valuable data, and drive sales.   


Key benefits of Shopify forms include:
  • Improved customer experience: Forms provide direct channels for communication, enabling you to offer personalized support and interactions.   
  • Data-driven insights: Collect essential customer information, conduct market research, and analyze feedback to refine your business strategies.
  • Increased sales: Generate leads, upsell products, and offer custom options to boost revenue.
  • Efficient operations: Streamline processes, manage customer support efficiently, and optimize inventory management.
  • Stronger customer relationships: Build trust, loyalty, and a sense of community through open communication and engagement.

1.3. Types of Shopify Forms and Their Uses

Here are some of the most common types of Shopify forms and their purposes:


Contact Forms:

  • Use cases: Provide a way for customers to contact you with inquiries, questions, or feedback. Usually displayed in the Shopify Contact Us page
  • Example: A simple form with fields for name, email, and message.

shopify contact form

The most common use case of Shopify form is the contact form. 

Newsletter Signup Forms:

  • Use cases: Build your email list to nurture customer relationships and promote products.
  • Example: A Shopify email form with fields for email addresses and offering an incentive like a discount.

Customer Feedback Forms:

  • Use cases: Gather customer opinions about your products, services, or website.
  • Example: A survey-style form with questions about satisfaction, product quality, and suggestions.

shopify feedback form

Shopify forms can be used to collect customer feedback

Wholesale Forms:

  • Use cases: Allow potential wholesale customers to inquire about wholesale opportunities.
  • Example: A Shopify form collecting business information, contact details, and product interest.

Customer Order Forms:

  • Use cases: Offer customers the ability to request custom products or services.
  • Example: A Shopify form with fields for product specifications, personalization options, and customer details.

Shopify customer order forms

DriveDressy uses Shopify forms for custom orders. 

Surveys:

  • Use cases: Conduct market research, gather customer preferences, or measure brand awareness.
  • Example: A multi-page form with various question types (multiple choice, rating scales, open-ended).

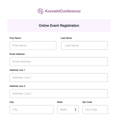
Event Registration Forms:

  • Use cases: Collect attendee information for events, workshops, or webinars.
  • Example: A Shopify form with fields for name, email, ticket type, and payment information.

Shopify registration forms

Shopify forms can be used as the registration.

RSVP Forms (Response Forms):

  • Use cases: Manage guest lists for events and track attendance.
  • Example: A simple form with fields for name and confirmation of attendance.

Support Ticket Forms: 

  • Use cases: Provide a channel for customers to submit support requests.
  • Example: A Shopify form with fields for subject, description, and contact information.

Shopify support ticket form

Customers can send support ticket through Shopify forms. 

By understanding the various types and benefits of Shopify forms, you can harness their potential to unlock your store's strengths!


Now, let's explore how to effectively implement Shopify forms and achieve these goals.

2. How to create a form on Shopify?

There are two primary methods to incorporate forms into your Shopify store: utilizing Shopify's built-in form builder or leveraging third-party apps. Each method has its advantages and considerations. Let's explore the primary options!

2.1. Shopify Forms app - Shopify native form builder

Before we dive into the steps, it's essential to grasp that Shopify Forms is a built-in app that allows you to create various forms for your store. These forms can be either pop-up or inline, depending on your preference.

Shopify forms

Shopify Forms app

For merchants seeking a straightforward approach, the built-in Shopify form builder offers a convenient solution. With a user-friendly interface, you can create a basic contact form for Shopify, newsletter signups, and other standard forms. While limited in customization, this option is ideal for simple form requirements.


Here's a breakdown of its setup:

1. Log in to your Shopify admin.
2. Navigate to Apps > Forms.
3. Click Create form > Choose between a Popup or Inline form. 
4. Give your form a name (e.g., "Contact Form in Shopify") > Click Create.
5. In the Form section, configure form settings:

  • Title: Enter a clear and concise title (e.g., "Contact Us").
  • Content: Provide a brief explanation of the form's purpose.
  • Button label: Choose a strong call to action (e.g., "Submit").
  • Consent disclaimer: Include any necessary legal or privacy information.

Shopify forms

How the form looks like in Shopify editor preview and on the website.

6. Add Shopify custom form fields:

  • Click Add field.
  • Choose the appropriate field type (e.g., single-line text for name, email for email address).
  • Customize field labels and make fields required if necessary.
  • Add more fields as needed (e.g., phone number, message).
  • Drag and drop fields to determine their order on the form.

7. Use the preview button to see how the form will look.

8. Test the form by submitting it to ensure it works correctly.

9. Click Save to finalize your form.


It's important to note that support for Shopify apps can be inconsistent and may have limitations.


While the Shopify Forms app offers a straightforward solution for basic needs, some merchants may require more advanced functionality. Let's explore alternative options that provide enhanced features and flexibility.

2.2. Third-Party Form Builders for Shopify Forms

For businesses seeking greater customization and advanced features, third-party form builders offer a compelling solution. These tools can take your Shopify forms to the next level, providing a wide array of options to suit various needs.


#1. Form Builder Apps from Shopify App Store


For those preferring to stay within the Shopify ecosystem, the App Store offers a plethora of form-builder apps. These apps are designed to integrate seamlessly with your Shopify store, often offering direct connections to other Shopify tools.


To find the right Shopify form builder app:

  1. Access the Shopify App Store.
  2. Search for "form builder" or the exact feature you need. 
  3. Compare features, reviews, and pricing of different apps.
  4. Install the chosen app.
  5. Follow the app's instructions to create and embed forms.

Shopify form builder apps

The form builder apps in Shopify App Store

  • You can check out the top-rated Shopify contact form app - Qikify for a simple, user-friendly app while including most essential features.

#2. Third-party Form Builder Tools


If you require advanced features and complete design control, dedicated form builder platforms like Typeform, Jotform, and 123 Form offer robust solutions. These platforms provide a wider array of templates, customization options, and analytics for your Shopify forms.


However, these platforms require you to embed a generated code snippet into your Shopify theme.


To integrate a dedicated form builder:

  1. Choose a form builder platform.
  2. Create your desired form.
  3. Obtain the embed code from the platform.
  4. Access your Shopify theme's code editor.
  5. Paste the embed code into the appropriate section (usually the header or footer).

In essence, each method for incorporating forms into your Shopify store - using the built-in tool or a third-party form builder app Shopify - presents distinct advantages and considerations.

Pros

Cons

Shopify Built-in Forms

  • Simplicity: User-friendly interface for creating basic forms.
  • Cost-effective: Free.
  • Seamless integration: Works seamlessly with other Shopify tools.

  • Limited customization: Offers fewer design options and features compared to third-party options.
  • Basic forms: May not suffice for complex forms.

Third-Party Form Builders

  • Customization: Extensive design options and features.
  • Advanced functionalities: Conditional logic, payment integration, and analytics.
  • Integration capabilities: Connect with other marketing and sales tools.

  • Cost: Often involves additional fees.
  • Technical requirements: May require coding knowledge for embedding forms.
  • Integration complexity: Requires careful setup to integrate with your Shopify store.

By carefully evaluating your specific needs and resources, you can select the form-building method that best aligns with your business goals. Whether you opt for a Shopify app or a dedicated platform, expanding your Shopify form capabilities can significantly enhance your customer experience and drive conversions.


So let's continue with some practical tips for creating effective Shopify forms, regardless of the tool you choose.

3. Helpful Tips for Creating Effective Shopify Forms

3.1 Common Pitfalls in Shopify Form Creation: What to Avoid

To ensure a positive user experience and effective data collection, avoid these common pitfalls when creating Shopify forms:

  • Overly long forms: Excessive fields can deter users from completing the form.
  • Lack of conditional logic: Irrelevant questions can frustrate users.
  • Unclear labels or instructions: Confusing forms lead to errors and abandonment.
  • Poor mobile responsiveness: Forms should be easily accessible and usable on all devices.
  • Insufficient data security: Protect sensitive information with appropriate measures.

Now that we've explored the pitfalls to avoid, let's turn our attention to the positive practices that can elevate your Shopify forms from good to great.

3.2. Best Practices for Shopify Form Optimization: What to Follow

Adhering to these guidelines will optimize your Shopify forms for conversions and user satisfaction:

  • Concise and relevant: Focus on collecting essential information by prioritizing required fields and avoiding unnecessary questions.
  • Clear and descriptive labels: Use clear and concise language to explain field requirements, and provide helpful tooltips or explanations for complex fields.
  • Responsive design: Ensure Shopify forms display correctly and function seamlessly on all devices.
  • WCAG compliance: Make forms accessible to users with disabilities by adhering to WCAG guidelines.
  • Data security: Implement robust security measures to protect customer data, including SSL certificates and secure data storage.
  • Input validation: Verify data accuracy before submission to prevent errors and improve data quality.
  • Brand consistency: Maintain a consistent look and feel with your overall store design.
  • Conditional logic: Use conditional logic to display relevant questions based on user input, improving user experience and reducing form length.
  • A/B testing: Experiment with different form designs and layouts to optimize performance and conversion rates.

Understanding both what to avoid and what to implement is crucial for creating effective Shopify forms. However, theory alone isn't enough. Let's move on to some real-world examples that illustrate these principles in action.

4. Shopify Forms: Real-world Examples & Best Practices

4.1. Shopify Forms Use Cases

Shopify forms offer businesses a versatile tool for interacting with customers and gathering valuable data. To understand their potential, let's analyze some real-world examples.


#1 DriveDressy - Contact Us Form Example


DriveDressy serves as a prime example of how the Shopify Contact Us form can be used effectively. By focusing on clarity, essential information, and functionality, DriveDressy has created a form that meets basic customer needs. Here are its key strengths:

  • Clear and concise: The form is easy to understand with straightforward labels.
  • Required information: It only asks for essential information, such as name, email, and message.
  • File upload: Allows customers to attach relevant files for inquiries.
  • Specific instructions: Clearly states that photos are required for certain inquiries.

drivedressy shopify from

DriveDressy makes their form simple and clear. 

#2 Sunday Somewhere - Newsletter signup form example


On the other hand, Sunday Somewhere is a concise and effective example of Shopify newsletter forms for capturing customer information while maintaining transparency. We can see that its success lies in the following:

  • Clear Value Proposition: The form clearly outlines the benefits of subscribing (10% off and updates).
  • Minimal Fields: The form requests only essential information (email and phone number), reducing friction.
  • Transparency: Clearly states the purpose of collecting data (marketing communications) and provides an opt-out option.
  • Legal Compliance: Includes necessary disclosures about SMS marketing, including consent, opt-out options, and privacy policy links.
  • Visually Appealing Design: The form's aesthetic aligns with the brand's overall look and feel, enhancing user experience.
  • Strong Call-to-Action: The vibrant red "Continue" button creates a clear and compelling next step.

Shopify newsletter signup form

Sunday Somewhere makes the form simple including the product image. 

4.2. Best Practices for Shopify Form Optimization

By analyzing the DriveDressy contact form, the Sunday Somewhere newsletter signup form, and other real-world examples, we can extract several best practices for creating effective Shopify forms:


#1 Strategic Form Placement

Where you place your form significantly impacts its visibility and completion rate.

  • Homepage: A prominent form can capture visitor interest immediately.
  • Product pages: Encourage purchases with post-purchase forms or related product recommendations.
  • Checkout process: Offer additional products or services at this crucial stage.
  • Contact Us Page: A dedicated contact page is essential for customers seeking to get in touch.

#2 Clear CTA Buttons

A compelling call-to-action (CTA) is essential for driving form submissions.

  • Strong action verbs: Use words like "Submit", "Sign Up", or "Get Started".
  • Clear benefits: Highlight the value of completing the form.
  • Visual prominence: Ensure the button stands out from the page.

#3 Progress Indicators for Multi-Step Forms

For lengthy forms, progress indicators guide users and reduce abandonment rates.

  • Visual cues: Show users how far they've progressed (e.g., progress bars, step indicators).
  • Clear steps: Break down the form into logical sections.
  • Save and continue: Allow users to save their progress and return later.

#4 Smart Default Values

Pre-filling fields with relevant information can save time and improve user experience.

  • Autofill addresses: Use browser autofill functionality.
  • Default selections: Offer common options as default choices.
  • Conditional defaults: Adjust default values based on user input.

#5 Inline Form Validation

You can provide real-time feedback to users as they fill out the form.

  • Error messages: Clearly indicate errors and how to correct them.
  • Real-time checks: Validate fields as users type.
  • Visual cues: Use color or icons to highlight errors.

#6 Thank You Pages or Messages

The final stage of the Shopify form completion process, the thank you page or message, plays a crucial role in reinforcing the value exchange and building customer relationships.

  • Confirmation message: Clearly indicate successful submission.
  • Additional offers: Provide discounts, exclusive content, or next steps.
  • Tracking: Use thank you pages to gather additional data or insights.

reasons for abandonments during checkout

Shopify forms can be displayed at the final step of the buying journey. 

By implementing these best practices, you can create Shopify forms that not only collect valuable information but also enhance the overall customer experience and drive conversions.


However, even the best-designed forms can encounter challenges. In the next section, we'll explore common issues with Shopify forms and provide solutions to overcome them.

5. Common Issues with Shopify Forms

While Shopify forms offer a convenient way to interact with customers, they can sometimes encounter challenges. Understanding common issues can help you troubleshoot and optimize your forms effectively.

Issues

Possible Causes

Solutions

#1 Form Not Submitting

  • JavaScript errors preventing form submission
  • Server-side issues hindering data processing
  • Incorrect form configuration (missing action, method, or fields)
  • Conflicts with other scripts or plugins

  • Check browser console for JavaScript errors.
  • Verify server-side scripts for errors (PHP, Ruby, etc.).
  • Ensure form has a valid action attribute pointing to the correct script.
  • Test form submission without additional scripts or plugins.

#2 Styling Inconsistencies Across Devices

  • Lack of responsive design implementation
  • Conflicting CSS styles
  • Browser-specific rendering issues

  • Use CSS media queries for device-specific styling.
  • Test form appearance on different devices and screen sizes.
  • Use a responsive framework or grid system.

#3 Integration Problems with Email Marketing Tools

  • Incorrect API key or authentication settings
  • Mismatched form fields and email list fields
  • Server or network issues
  • Third-party app conflicts

  • Double-check API key and authentication settings.
  • Verify field mapping between form and email list.
  • Test integration with a single form submission.
  • Temporarily disable other integrations to isolate the issue.

#4 CAPTCHA Issues (Spam)

  • Excessive CAPTCHAs creating user friction
  • CAPTCHA configuration issues
  • CAPTCHA service outages

  • Use CAPTCHAs sparingly or consider alternatives like honeypot fields.
  • Ensure CAPTCHA provider is reliable and configured correctly.
  • Test CAPTCHA functionality to identify and resolve issues.

#5 Form Data Not Being Saved or Sent Correctly

  • Server-side script errors
  • Database connection issues
  • Incorrect form action or method
  • Email server configuration problems

  • Check server logs for error messages.
  • Verify database connection and table structure.
  • Ensure form action points are aligned to the correct script.
  • Test email sending with a basic script to isolate issues.

#6 Slow Load Times for Complex and Long Forms

  • Excessive image and media files: Large file sizes can significantly impact load times.   
  • Complex JavaScript and CSS: Overly complex code can slow down rendering.
  • Multiple HTTP requests: Numerous external resources can delay page loading.
  • Server-side processing: Heavy server-side calculations or database queries can slow down response times.

  • Optimize images: Compress images without compromising quality.   
  • Minify CSS and JavaScript: Remove unnecessary characters to reduce file size.   
  • Combine files: Reduce HTTP requests by combining CSS and JavaScript files.   
  • Leverage browser caching: Enable caching for static resources.   
  • Lazy loading: Load form elements only when needed to improve initial load time.   
  • Optimize server-side performance: Improve database query efficiency and reduce server load.
  • Content Delivery Networks (CDNs): Distribute content across multiple servers for faster delivery.

Shopify forms captcha issues
It's important to correctly implement CAPTCHA to prevent form spam. 

By understanding these common issues and implementing the suggested solutions, you can significantly improve the performance and reliability of your Shopify forms.

6. Conclusion: Unlocking the Power of Shopify Forms

Well-designed Shopify forms are essential for businesses seeking to enhance customer experience, gather valuable data, and drive conversions. By avoiding common pitfalls and implementing best practices, you can create forms that are not only functional but also engaging and effective.


From strategic placement and clear calls-to-action to data security and optimization, every aspect of form design contributes to overall success.


By implementing the strategies outlined in this guide, you can unlock the full potential of your forms and drive business growth. Let’s transform your Shopify forms into conversion powerhouses!

7. FAQs

1. How to create a form in Shopify?

Shopify offers two primary methods for creating forms: the built-in Shopify form builder and third-party apps. 


The built-in option is straightforward and suitable for basic forms like contact forms or newsletter sign-ups. For more complex forms with advanced features, customization, or integrations, third-party apps provide greater flexibility. 


You should consider factors like desired features, design preferences, and budget when choosing the best option for your store.

2. What is the best form builder for Shopify?

Determining the best Shopify form builder for your store depends on your specific needs and preferences. Here are some factors to consider:

  • Features: Consider the specific features you need (e.g., conditional logic, file uploads, integrations) for your powerful form builder Shopify.
  • Design: Evaluate the customization options to match your store's aesthetic.
  • Pricing: Compare pricing plans and features to find the best value.
  • Ease of use: Choose a platform that is intuitive and easy to navigate.   

3. How to embed Google form in Shopify?

While Shopify doesn't directly support Google Forms, you can embed them using your theme's code or third-party apps.


Method 1: Using an Embed Code

  1. Create your Google Form: Design your form on Google Forms.   
  2. Obtain the embed code: Google Forms provides an embed code option.   
  3. Paste the code into your Shopify theme: Access your theme's code editor and insert the code into a desired section (e.g., homepage, product page).

Note: This method requires basic coding knowledge and might affect your theme's layout if not implemented carefully.


Method 2: Using a Third-Party App
Several Shopify apps allow you to embed external content, including Google Forms. These apps often provide user-friendly interfaces and additional features like pop-ups or triggered actions.

You can check a detailed guide on how to add a Google form to Shopify here!

4. How to edit contact form in Shopify?

Shopify doesn't offer a direct way to edit the Shopify contact form and customize the default template. However, there are two primary methods on how to create a custom form in Shopify:


Method 1: Using a Third-Party App

  1. Choose a suitable app from the Shopify App Store (e.g: Qikify Contact Form Builder or form builder Hulk app)
  2. Install the app.
  3. Configure the app to add Shopify contact form custom fields, modify the form layout, and customize the registration process.

Method 2: Editing Shopify contact form code (Advanced)

  1. Access your Shopify theme's code editor.   
  2. Locate the customer registration form template (usually in the templates folder).
  3. Modify the HTML, CSS, and Shopify contact form liquid code to add or remove fields, change layout, and customize styling.
  4. Test the modified Shopify contact form settings thoroughly to ensure correct functionality.

5. How to embed Klaviyo form on Shopify page?

To embed a Klaviyo form on your Shopify store, you'll typically use the provided embed code.

  • Create a Klaviyo Form: Build your desired form within the Klaviyo platform.
  • Obtain Embed Code: Klaviyo will provide you with an HTML code snippet for the form.   
  • Choose Placement: Decide where you want the form to appear on your Shopify store (e.g., homepage, footer, product page).
  • Access Shopify Theme Code: Navigate to your Shopify admin, then to Online Store > Themes > Actions > Edit code.   
  • Find the Right Template: Locate the appropriate template file (e.g., footer.liquid, product-template.liquid) based on your desired placement.
  • Paste the Embed Code: Insert the Klaviyo form's embed code into the desired location within the template.
  • Save and Preview: Save the theme changes and preview your Shopify store to see the embedded form.

You can refer to this document on how to embed the Klaviyo form on Shopify.

Gain Insightful Knowledge to Grow Your Business Stronger

By clicking "Subscribe," you agree to allow Qikify to send newsletter emails to your address. For more information, please read our Privacy Policy.

About The Author

  • Hannah

    With over 5 years of experience under her belt, Hannah is an eCommerce writer who crafts content specifically for a website that deals with online sales. She simplifies technical details to assist entrepreneurs in utilizing the platform and launching their online ventures.

Copyright © 2018 - 2023 qikify. All Rights Reserved.